v. 2025.1.2

What reports can Online Designer do?

Practically any: invoices, financial reports, product catalogs with color profile support, restaurant menus, sales details, questionnaires with electronic forms, airline tickets, utility bills, and much more. If you have data that needs to be made visually understandable, FastReport is the perfect solution for you.

Características e benefícios Online Designer

Ease of use
You just need to connect the data, drag it onto the template page, adjust the display, and save the finished document.
Cross-platform
Our designer can be run on the Android, iOS, or Windows platforms in any modern browser from a computer, tablet, communicator, game console, or TV.
Lots of components
A variety of elements are available for building reports in the designer: from text and images to mathematical formulas and 3D diagrams.
Quick access to the report and data structure
From the report tree and properties tree, you can edit the report structure, parameters, and filters, as well as data sources with global styles.
Compatibility and integration
Online Designer is part of the unified FastReport platform in C#. Create reports in the designer and store templates, ready-made files, and data sources in FastReport Cloud.
Available documentation
Take advantage of our documentation, free video tutorials, and numerous articles for every usage scenario of our product in your projects to achieve meaningful results in the shortest possible time.

Objects for reporting

Available objects: Text, Picture, Shape, Line, Subreports, Table, Matrix, Barcode, Graphs, Maps, RichText, Checkbox, Postal code, Text in cells, Exports in 40+ formats, Dialog forms, Data sources, Runtime Report Designer, Report script, Saving templates in clouds.

Localization is supported for more than 40 popular languages of the world.

Objects for reporting

Flexible customization

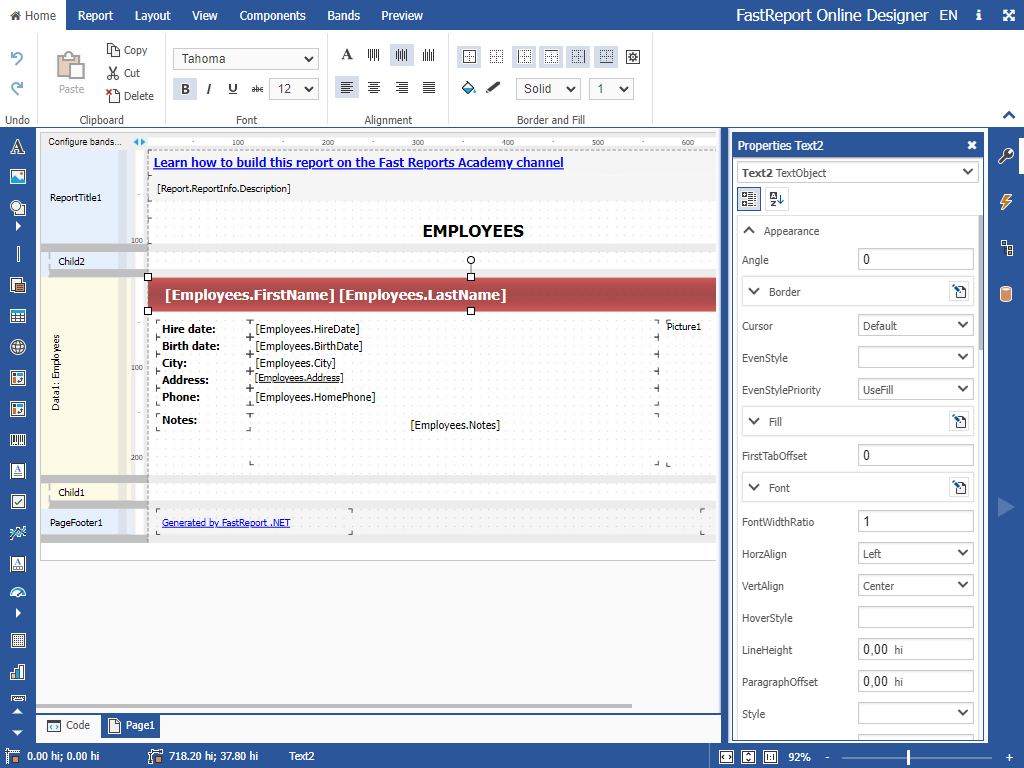
Configure the Online Designer to suit your preferences. Keep only the necessary components, as this will make the designer faster and more lightweight.

The Report Designer has an adaptive interface, as the user's interaction with the designer is tailored to the capabilities of the platform. Full functionality in the browser is possible thanks to the touch-oriented design. Additionally, our designer fully supports keyboard shortcuts.

The style of the Report Designer matches the style of your web application: from classic office to minimalist. Our Builder supports the creation of custom themes—choose the most pleasing colors for you in just a few clicks.

Flexible customization

Exports to convenient formats

Filters for exporting the finished report to many formats: PDF, RTF, XLSX, XML, DOCX, TXT, CSV, PowerPoint, HTML, MHT, XPS, JPEG, BMP, PNG, Open Document Format (ODT, ODS, ODP), XAML, Scalable Vector Graphics (SVG), DBF, PPML, etc. Cloud support: OneDrive, Google Drive, Box, Dropbox, FastReport Cloud.

Online Designer allows you to quickly convert reports with editable fields (such as text fields, combo boxes, checkboxes, radio buttons, and graphics fields) into PDF documents without connecting additional libraries. Save your reports in popular formats: PDF 1.5, PDF/A-1a, PDF/A-2a, PDF/A-2b, PDF/A-2u, PDF/A-3a, PDF/A-3b, PDF/X-3 and PDF/X-4, which are secure, accessible and reliable.

Exports to convenient formats

This set of components is part of the Ultimate solution, with which you can create your business projects on all modern .NET, ASP.NET, Blazor, WASM, WPF, WinForms, Avalonia UI, Mono, and other platforms. With your team, you can work both in the desktop designer and directly from the browser. The Ultimate package also includes components for data visualization, namely business graphics with a set of charts and OLAP products for fast processing of large data sets.

Opções de entrega

Características
de $ 1.499
WEB
de $ 799
de $ 299
FastReport Engine
WEB components
WinForms components
WPF components
Mono components
Online Designer
Report script engine
Data connections
Reporting features
Report objects
Barcodes
Charts
Printing
Export in formats
Transports
Convertors from
Plugins
Custom plugin support
Source Code

Artigos reenviados

20 de abril de 2023

How to update FastReport Online Designer to the latest version

Starting with version 2021.4.5 FastReport Online Designer is switched to new licensing. You can read more about it in the license agreement. Along with it, there’s a new way of installing the updates. In order to update the Online Designer to the latest version you need to log into your customer panel: https://cpanel.fast-report.com/ Then in the FastReport Online Designer tab switch to the FastReport Online Designer Builder page.  Now you need to set up the designer configuration.  Or you can rebuild the designer with the settings you were previously using.  After the setup is done, click on the “Build” button in the “Plugins” tab.  After the preceding steps are done, FastReport Online Designer will soon appear in the FastReport Online Designer Builder or be emailed to you. 
Ler
07 de março de 2023

Configuring the API for building FastReport Online Designer

FastReport Online Designer Builder now can build the designer using the API. Previously, users had to manually build in FastReport Online Designer Builder. You could download the result or receive it by mail. Now you can automate this process to update FastReport Online Designer if the product version changes. To do this, you need to create features that work with the API and deploy the designer build on your servers. As an example of using the API, you can request a product version once a day, and if it has changed, automatically request a build. And after that, host the updated designer. API Key A user is authenticated using an API key, which you can create in FastReport Online Designer Builder. To create a key, you need to: - sign in with your account;- go to the new API Keys menu item;- click on the button in the lower right corner or the red inscription.   After that, you will have a new API key generated. You can click on the key to copy it and use it for authentication in API.   Build request To request a build, make a POST request at: https://dsg2014.fast-report.com:3000/builderAPI/build The request body must contain at least your API key. If you don’t specify the parameter, its default Value will be used! Minimum request example: { "APIkey": "Your API key" } The parameters that the API accepts for build are described below. Parameters  Parameter  Description  themes  The build theme.  Data type: string  See the values in the themes table.  components  Components to be included in the build.  Data type: array  See the values in the components table.  bands  Bands to be included in the build.  Data type: array  See the values in the bands table.  controls  The dialog box controls to be included in the build.  Data type: array  See the values in the controls table.  plugins  Plugins to be included in the build.  Data type: array  See the values in the plugins table.  customization  The control panels to be included in the build.  Data type: array  See the values in the panels table.  config  Build configuration.  Data type: object  See the object structure in the settings table.   Themes  Value  Description  none  No theme  classic  Use classic theme  mini  Use minimal theme   Components  Value  Description  TextObject  Text Component  PictureObject  Picture Component  ShapeObject  Shape Component  PolygonObject  Polygon Component  PolyLineObject  Polyline Component  LineObject  Line Component  SubreportObject  Subreport Component  TableObject  Table Component  MatrixObject  Matrix Component  AdvMatrixObject  Advanced Matrix Component  BarcodeObject  Barcode Component  RichObject  Rich Text Component  CheckBoxObject  Checkbox Component  CellularTextObject  Cellular Text Component  LinearGauge  Linear Gauge Component  SimpleGauge  Simple Gauge Component  RadialGauge  Radial Gauge Component  SimpleProgressGauge  Simple Progress Gauge Component  HtmlObject  HTML Component  SVGObject  SVG Component  ContainerObject  Container Component  DigitalSignatureObject  Digital Signature Component  MapObject  Map Component   Bands  Value  Description  ReportTitleBand  Report Title  ReportSummaryBand  Report Summary  PageHeaderBand  Page Header  PageFooterBand  Page Footer  ColumnHeaderBand  Column Header  ColumnFooterBand  Column Footer  DataHeaderBand  Data Header  DataBand  Data  DataFooterBand  Data Footer  GroupHeaderBand  Group Header  GroupFooterBand  Group Footer  ChildBand  Child Band  OverlayBand  Overlay Band   Controls  Value  Description  ButtonControl  Button  CheckBoxControl  Checkbox  CheckedListBoxControl  Checked List  ComboBoxControl  Text with Combobox  DateTimePickerControl  Date Time Picker  LabelControl  Label  ListBoxControl  List  MonthCalendarControl  Calendar  RadioButtonControl  Radio Button  TextBoxControl  Text Box   Plugins  Value  Description  CODE  Page with Code  GUIDES  Guidance Lines  POSITION_BLOCK  Position of the component when moving  RULER  Ruler  BAND_HORZ_RESIZER  Band Horizontal Resizing  HOTKEY  Hot Keys  CONTEXT_MENU  Context Menu  DBLCLICK  Double Click   Panels  Value  Description  Properties  Properties Panel  Events  Events Panel  ReportTree  Repot Tree Panel  Data  Data Panel  Preview  Page Preview Panel   Settings  Value  Description  features  Data type: array  See the list of values in the features table.  entryName  Data type: object {     "name": "index",     "ext": "html" }  publicPath  Data type: string.  Public path to the application on the server.  saveSuccessRedirect  Data type: object. {       "url": null,       "blank": false,       "useParent": false,       "removeConfirmation": true }        customFonts  Link to fonts  API  Data type: array  See the list of values in the API table.   Features {     "name": "SHOW_BAND_TITLE",     "enabled": true } Object contains feature key and checkbox  Value  Description  SHOW_BAND_TITLE  Band Title  ADD_BANDS  Adding bands  SORT_BANDS  Sorting bands  RESIZE_BANDS  Resizing bands  CONFIRM_BEFORE_EXIT  Confirm Before Exit  MOVABLE_POPUPS  Movable Popups  REVISION_FILES  Hash In File Names  MINIFY  Code Minification  ENABLE_PREVIEW_BUTTON  Preview Button  READONLY_MODE  Disable Editing  AUTOSAVE  Autosave   API {     "name": "API_SAVE_REPORT",     "value": "../FastReport.Export.axd?putReport=#{id}" } The object contains an API key and a link  Value  Description  API_SAVE_REPORT  Report saving  API_MAKE_PREVIEW  Report Preview  API_GET_REPORT  Getting report  API_GET_FUNCTIONS  Getting functions  API_GET_CUSTOM_CONFIG  Application Config  API_GET_CONNECTION_TYPES  Connection Types  API_GET_CONNECTION_TABLES  Connection Tables  API_GET_CONNECTION_STRING_PROPERTIES  Connection String Properties  API_MAKE_CONNECTION_STRING  Creating the Connection String  API_GET_MSCHART_TEMPLATE  MSChart Template After requesting a build, you will get a UUID to check its status. Example of the response: { "message": "Successfully queued", "code": 0, "payload": { "UUID": "25d36576-c5e2-49f4-8ab0-73838c457336" } }   Checking the build status To check the build status, make a GET request to: https://dsg2014.fast-report.com:3000/builderAPI/checkBuild/{apiKey}/{buildUUID} The link should contain your API key used for the build and the UUID you got when you requested it. You can see several statuses in the response depending on the build stage. 1 (QUEUED) –The build is scheduled and is now queued.2 (PROCESSING) –Build started but still processing.3 (BUILT) – The completed, you can download it. Example of the response: { "code": 0, "payload": { "statusCode": 2, "statusText": "PROCESSING" } } If the build is completed, you will receive a download link in the response.   Downloading the latest build To download the built application, make a GET request to: https://dsg2014.fast-report.com:3000/builderAPI/download/{apiKey}  Specify your API key in the link. In response to the request, you will receive an archive file with the built application. Getting the current version of FastReport Online Designer Make a GET request to get the current version of the application: https://dsg2014.fast-report.com:3000/builderAPI/designer-version/{apiKey} Specify your API key in the link. In response, you will receive the current version of FastReport Online Designer. Example of the response: { "payload": { "version": "2023.1.3" }, "code": 0 } Our team will continue to improve the client experience when working with FastReport products. For any questions, contatc our support at support@fast-report.com.
Ler
30 de junho de 2019

How to use Online Designer in a knockout.js application

The knockout.js library was quite popular among web developers before the appearance of angular. Despite the obvious advantages of angular, knockout is still in demand. Many web applications are written on it. Some of them need reporting. Therefore, we will discuss in this article how to integrate the FastReport online report designer into the application, with the client part on the knockout, and the server part on the ASP.Net Core. First of all, we need the Knockout application template for the dotnet platform. You must have the NET Core 2.0 SDK or MS Visual Studio 2017 installed. Open the Windows command prompt. Go to the directory where you plan to create the application. Enter the command: dotnet new — install Microsoft.AspNetCore.SpaTemplates::* As a result, we should see a list of available one-page application templates: In this list we see knockout - it means you can create an application from a template. Enter the command: dotnet new knockout –o KnockOnlineDesigner This command creates a demo application with the prepared structure. After creating the application, you need to install the necessary packages. Therefore, go to the folder with the created application: cd KnockOnlineDesigner And install the packages: npm install Open the created project. Now you can run the application and see three demo pages. But our task is to create our own page with an online designer. First of all, you need to install the FastReport.Net packages in the Nuget package manager. Open the manager and configure the local package source - the Nuget folder in the FastReport.Net installation directory. The FastReport.Core and FastReport.Web packages are installed, now you need to enable the use of FastReport in the application. Editing the Startup.cs file. Add a line to the Configure method:   app.UseFastReport(); Add the App_Data folder to the wwwroot folder. Put in it the xml database for reports:   Then we move to editing SampleDataController controller. We remove all the methods from it and add our own: 1 2 3 4 5 6 7 8 9 10 11 12 13 14 15 16 17 18 19 20 21 22 23 24 25 26 27 28 29 30 31 32 33 34 35 36 37 38 39 40 41 42 43 44 45 46 47 48 49 50 51 52 53 54 55 56 57 58 59 60 61 62 63 64 65 66 67 68 69 70 71 72 73 [Route("api/[controller]")] public class SampleDataController : Controller { private IHostingEnvironment _env;   public SampleDataController(IHostingEnvironment env) { _env = env; }   // public string ReportPath; [HttpGet("[action]")] public IActionResult Design(string ReportName) { var webRoot = _env.WebRootPath; WebReport WebReport = new WebReport(); WebReport.Width = "1000"; WebReport.Height = "1000"; Task.WaitAll(); var path = System.IO.Path.Combine(webRoot, "App_Data/", ReportName); if (System.IO.File.Exists(path)) { WebReport.Report.Load(System.IO.Path.Combine(webRoot, "App_Data/", ReportName)); // Load the report into the WebReport object } System.Data.DataSet dataSet = new System.Data.DataSet(); // Create a data source dataSet.ReadXml(System.IO.Path.Combine(webRoot, "App_Data/nwind.xml")); // Open the xml database WebReport.Report.RegisterData(dataSet, "NorthWind"); // Registering the data source in the report WebReport.Mode = WebReportMode.Designer; // Set the mode of the object web report - display designer WebReport.DesignerLocale = "en"; WebReport.DesignerPath = @"WebReportDesigner/index.html"; // We set the URL of the online designer WebReport.DesignerSaveCallBack = @"api/SampleData/SaveDesignedReport"; // Set the view URL for the report save method WebReport.Debug = true; ViewBag.WebReport = WebReport; // pass the report to View return View(); }   [HttpPost("[action]")] // call-back for save the designed report public IActionResult SaveDesignedReport(string reportID, string reportUUID) { var webRoot = _env.WebRootPath; ViewBag.Message = String.Format("Confirmed {0} {1}", reportID, reportUUID); // We set the message for representation   Stream reportForSave = Request.Body; // Write the result of the Post request to the stream. string pathToSave = System.IO.Path.Combine(webRoot, @"App_Data/TestReport.frx"); // get the path to save the file using (FileStream file = new FileStream(pathToSave, FileMode.Create)) // Create a file stream { reportForSave.CopyTo(file); // Save the result of the query to a file } return View(); }   [HttpPost("[action]")] public async Task<IActionResult> Upload(List<IFormFile> files) { long size = files.Sum(f => f.Length);   var webRoot = _env.WebRootPath;   var filePath = System.IO.Path.Combine(webRoot, (String.Format("App_Data/{0}", files[0].FileName)));   // full path to file in temp location   if (files[0].Length > 0) { using (var stream = new FileStream(filePath, FileMode.Create)) { await files[0].CopyToAsync(stream); stream.Close(); } } return RedirectToAction("Design", "SampleData", new { ReportName = Path.GetFileName(filePath)}); } }  The Design method creates a web report object and loads a report template into it. Then, this web report is switched to the development mode, and in fact is transmitted to the online designer. The SaveDesidnedReport method is needed to save the edited report on the server. The Upload method is used to upload a report file to the server. For Design and SaveDesignedReport methods, you need to create views. Right-click on the method signature and select Add view. To view Design.cshtml, change the code to: @await ViewBag.WebReport.Render() And for SaveDesignedReport.cshtml change it to: @ViewBag.Message The ClientApp folder contains the application on knockout.js. Let's display our report designer right on the home page. Expand the ClientApp-> components-> home-page folder. Edit the home-page.html file: 1 2 3 4 <div id="app"> <input type="file" id="FileName" accept=".frx" data-bind="event: { change: upload($element.files[0]) }" /> </div> <div data-bind="html: designer"></div>  Here we will display the open file dialog button. We transfer the uploaded file to the Upload function. Below, we display an online designer, obtained from the server. Now change the script file home-page.ts: 1 2 3 4 5 6 7 8 9 10 11 12 13 14 15 16 17 18 19 20 21 22 23 import * as ko from 'knockout';   class HomePageViewModel { public designer = ko.observable('');   upload(file: Blob) { var files = new FormData(); files.append("files", file) console.log(files); if (file != null) { fetch('api/SampleData/Upload', { method: 'POST', body: files }) .then(response => response.text()) .then(data => { this.designer(data); }); } } }   export default { viewModel: HomePageViewModel, template: require('./home-page.html') };  The Upload method receives the file and sends it to the server. In turn, the controller on the server uploads the report file to the online designer and returns it to the client. In the Upload method, we write the server's response to the designer variable. It remains to correct the site menu nav-menu.html. Remove unnecessary pages from it: 1 2 3 4 5 6 7 8 9 10 11 12 13 14 15 16 17 18 19 20 <div class='main-nav'> <div class='navbar navbar-inverse'> <div class='navbar-header'> <button type='button' class='navbar-toggle' data-toggle='collapse' data-target='.navbar-collapse'> <span class='sr-only'>Toggle navigation</span> </button> <a class='navbar-brand' href='/'>KnockOnlineDesigner</a> </div> <div class='clearfix'></div> <div class='navbar-collapse collapse'> <ul class='nav navbar-nav'> <li> <a data-bind='attr: { href: router.link("/") }, css: { active: route().page === "home-page" }'> <span class='glyphicon glyphicon-home'></span> Home </a> </li> </ul> </div> </div> </div>  And also edit the app-root.ts file and exclude unnecessary components from it: 1 2 3 4 5 6 7 8 9 10 11 12 13 14 15 16 17 18 19 class AppRootViewModel { public route: KnockoutObservable<Route>; public router: Router;   constructor(params: { history: History.History, basename: string }) { this.router = new Router(params.history, routes, params.basename); this.route = this.router.currentRoute; ko.components.register('nav-menu', navMenu); ko.components.register('home-page', require('bundle-loader?lazy!../home-page/home-page')); }   public dispose() { this.router.dispose(); Object.getOwnPropertyNames((<any>ko).components._allRegisteredComponents).forEach(componentName => { ko.components.unregister(componentName); }); } }   export default { viewModel: AppRootViewModel, template: require('./app-root.html') };  Run our demo app. Select the report file in frx format. The file will be uploaded to the server and transferred to the report designer: This way you can edit report templates from your knockout application.
Ler
Fast Reports
  • 800-985-8986 (English, US)
  • +31 97 01025-8466 (English, EU)
  • +49 30 56837-3928 (German, DE)
  • +55 19 98147-8148 (Portuguese, BR)
  • info@fast-report.com
  • 66 Canal Center Plaza, Ste 505, Alexandria, VA 22314

© 1998-2025 Fast Reports Inc.