Making reports with dialog forms
In our previous articles within the “Akademik” educational program, we have learned to install FastReport in Lazarus, mastered working with diagrams, charts, and bar codes, and connected a report to the data. Now we shall consider dialog forms.
Often, one needs to set certain parameters or transmit the data before displaying the report. Certainly, this can be done with the help of the programming environment, but FastReport possesses its own means for designing dialog forms. Also, besides standard pages, you may use several dialog forms in your report.
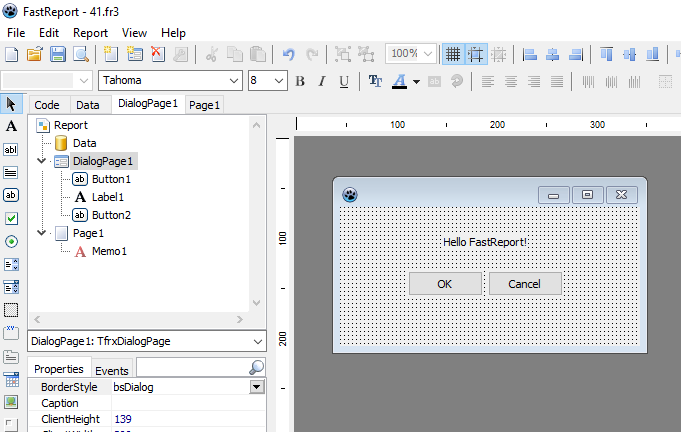
To create a new form, use the ![]() button in the designer toolbox – it adds a new page to the report. When you switch to the page with a dialog form, the designer operational field will change – now it is the form on which you may place objects – the control elements.
button in the designer toolbox – it adds a new page to the report. When you switch to the page with a dialog form, the designer operational field will change – now it is the form on which you may place objects – the control elements.
As you can see in the picture, the process of a dialog form modeling is similar to working with forms in any modern programming environment. The dialog form has a special grid to conveniently orient objects on it.
Control elements
The objects of a dialog form are standard for all modern programming environments. To place a control element, click the object, then click he appropriate place on the form.
|
Element |
Title |
Description |
| |
TfrxLabelControl |
The control element serves for displaying an explanation on the dialog form. |
| |
TfrxEditControl |
The control element serves for inputting a text line from the keyboard. |
| |
TfrxMemoControl |
The control element serves for inputting several text lines from the keyboard. |
| |
TfrxButtonControl |
The control element is a button. |
| |
TfrxCheckBoxControl |
The control element is a flag, which can be on and off. An explanation is displayed next to the flag. |
| |
TfrxRadioButtonControl |
The control element is an analog of a switch key with dependent fixation. For this reason, it is not used alone. |
| |
TfrxListBoxControl |
The control element is a list of lines with the possibility to select one of them. |
| |
TfrxComboBoxControl |
The control element is a dropdown list of lines with the possibility to select one of them. |
| |
TfrxPanelControl |
The control element is a panel which serves for uniting several controls. |
| |
TfrxGroupBoxControl |
The control element is a panel with an explanation, which serves for uniting several controls. |
| |
TfrxPageControl |
The control allows you to combine several tabs that contain different controls on the same form during the design process. |
| |
TfrxDateEditControl |
The control element is a field for inputting the date with a dropdown calendar. |
| |
TfrxImageControl |
The control element is an image in a BMP, ICO, WMF, or EMF format. |
| |
TfrxBevelControl |
The control element serves for formatting a dialog form. |
| |
TfrxBitBtnControl |
The control element is a button with an image. |
| |
TfrxSpeedButtonControl |
The control element is a button with an image. |
| |
TfrxMaskEditControl |
The control element is a field for inputting data according to a set template. |
| |
TfrxCheckListBoxControl |
The control element is a list of lines with flags. |
| |
DBLookupComboBox |
The control element is a list of boxes of the selected column in the table. |
“Hello, World!” report with a dialog form
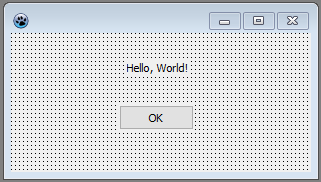
Now, using a dialog form, we will create a report displaying a greeting window before building. To do that:
- Create a new report and add a dialog form into the report.
- Place the objects TfrxLabelControl, TfrxButtonControl onto the form.
- Set the objects’ properties:
TfrxLabelControl:
Caption = 'Hello, World!'

TfrxButtonControl:
Caption = 'OK'
Default = True
ModalResult = mrOk
For the form, set the property BorderStyle = bsDialog.
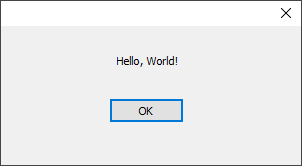
After finishing setting of the dialog form, return to the report page and place into it the “Text” object with some text inside. Start the report execution and get the form:
If you click the OK button, the report will be built and displayed. If you close the window with the cross button, the report will not be built. This is the algorithm of a dialog working in FastReport: if dialog forms are available, the report will be built only in case every form was closed with the OK button, i.e. the ModalResult = mrOk was returned. That is why we set the ModalResult property of our button to be equal to mrOk.
Inputting the parameters and transmitting them to the report
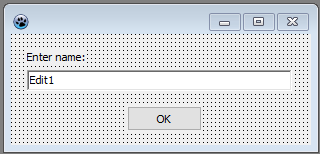
Let us complicate our example to show how one may transmit the values, inputted to the dialog form, to the report. For that, we complicate our form like this:
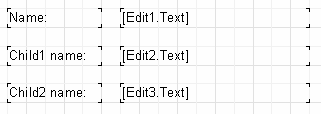
In the report page, place the “Text” object with the following content inside:
You've entered: [Edit1.Text]
Start the report and see that the parameter we had put in is displayed correctly. Other objects of the dialog form can be addressed in the same way. As any object has a unique name within the project, it can be used in any place of the document.
Interaction of control elements
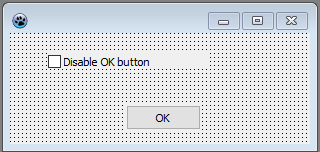
Using the script, it is easy to implement the logic of the dialog form functioning, for example, interaction between its controls. Let us consider a simple example. We modify our form as follows:
Double click the “CheckBox” object – it creates the OnClick event handler. Write the following code:
| PascalScript: | |
1 2 3 4 |
procedure CheckBox1OnClick(Sender: TfrxComponent); begin Button1.Enabled := not CheckBox1.Checked; end; |
| C++ Script: | |
1 2 3 4 |
void CheckBox1OnClick(TfrxComponent Sender) { Button1.Enabled = !CheckBox1.Checked; } |
After starting the report, it is worth checking how the button reacts to the change of the flag state.
Several dialog forms
Let us consider how a report with two dialog forms works. Let us create a report with two dialogs and one page:
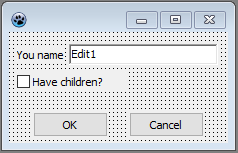
The first dialog form:
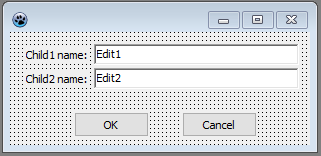
The second dialog form:
For the OK and Cancel buttons, we set the ModalResult properties (mrOk and mrCancel, respectively). Now we start the report. First, we will have to answer the questions from the first dialog (name, do you have children), then, after clicking the OK button – from the second one (children’s names). After clicking the OK button in the second dialog, the report will be built. This is how the FastReport core works – if there are several dialog windows, they are displayed in the order of their creation, and each next dialog will be displayed after the OK button is clicked in the previous dialog (with the property ModalResult = mrOk). If any of the dialogs in canceled (with the Cancel button or a cross icon in the caption bar), the report building will be stopped.
Managing the report forms
In the previous example, both dialog forms are displayed regardless of whether we marked the flag “Have children” or not. Now we will show how to conceal the second dialog in case this flag is not marked. For that, we create an OnClick handler of the OK button in the first dialog form (double click the button to create a handler):
| PascalScript: | |
1 2 3 4 |
procedure Button1OnClick(Sender: TfrxComponent); begin DialogPage2.Visible := CheckBox1.Checked; end; |
| C++Script: | |
1 2 3 4 |
void Button1OnClick(TfrxComponent Sender) { DialogPage2.Visible = CheckBox1.Checked; } |
This code conceals the second dialog form (DialogPage2), if the flag is not marked. If we start the report execution, we will see that everything works properly.
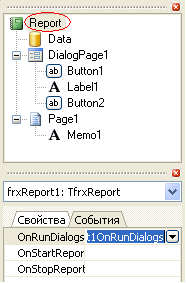
Another way of managing the forms consists in using the OnRunDialogs report event. To create a handler of this event, select the Report object in the report tree or in the object inspector, and switch to the “Events” tab in the inspector. A double click on the OnRunDialogs event will create the necessary handler.
In the handler, we write the following code:
| PascalScript: | |
1 2 3 4 5 6 7 8 9 |
procedure frxReport1OnRunDialogs(var Result: Boolean); begin Result := DialogPage1.ShowModal = mrOk; if Result then begin if CheckBox1.Checked then Result := DialogPage2.ShowModal = mrOk; end; end; |
| C++Script: | |
1 2 3 4 5 6 7 8 9 |
void frxReport1OnRunDialogs(bool &Result); { Result = DialogPage1.ShowModal == mrOk; if (Result) { if (CheckBox1.Checked) Result = DialogPage2.ShowModal == mrOk; } } |
The handler works as follows: we display the first dialog. If it was closed with the OK button, we check the state of the CheckBox1 flag and display the second dialog, if needed. If the handler returns Result = True, the report is built; if Result = False, the report stops.

