FastReport .NET WinForms

A classic set of components for generating reports and documents in Windows Forms applications

v. 2025.2.0

What reports can FastReport .NET WinForms do?

Practically any: invoices, financial reports, product catalogs with color profile support, restaurant menus, sales details, questionnaires with electronic forms, airline tickets, utility bills, and much more. If you have data that needs to be made visually understandable, FastReport is the perfect solution for you.

Features and Benefits WinForms
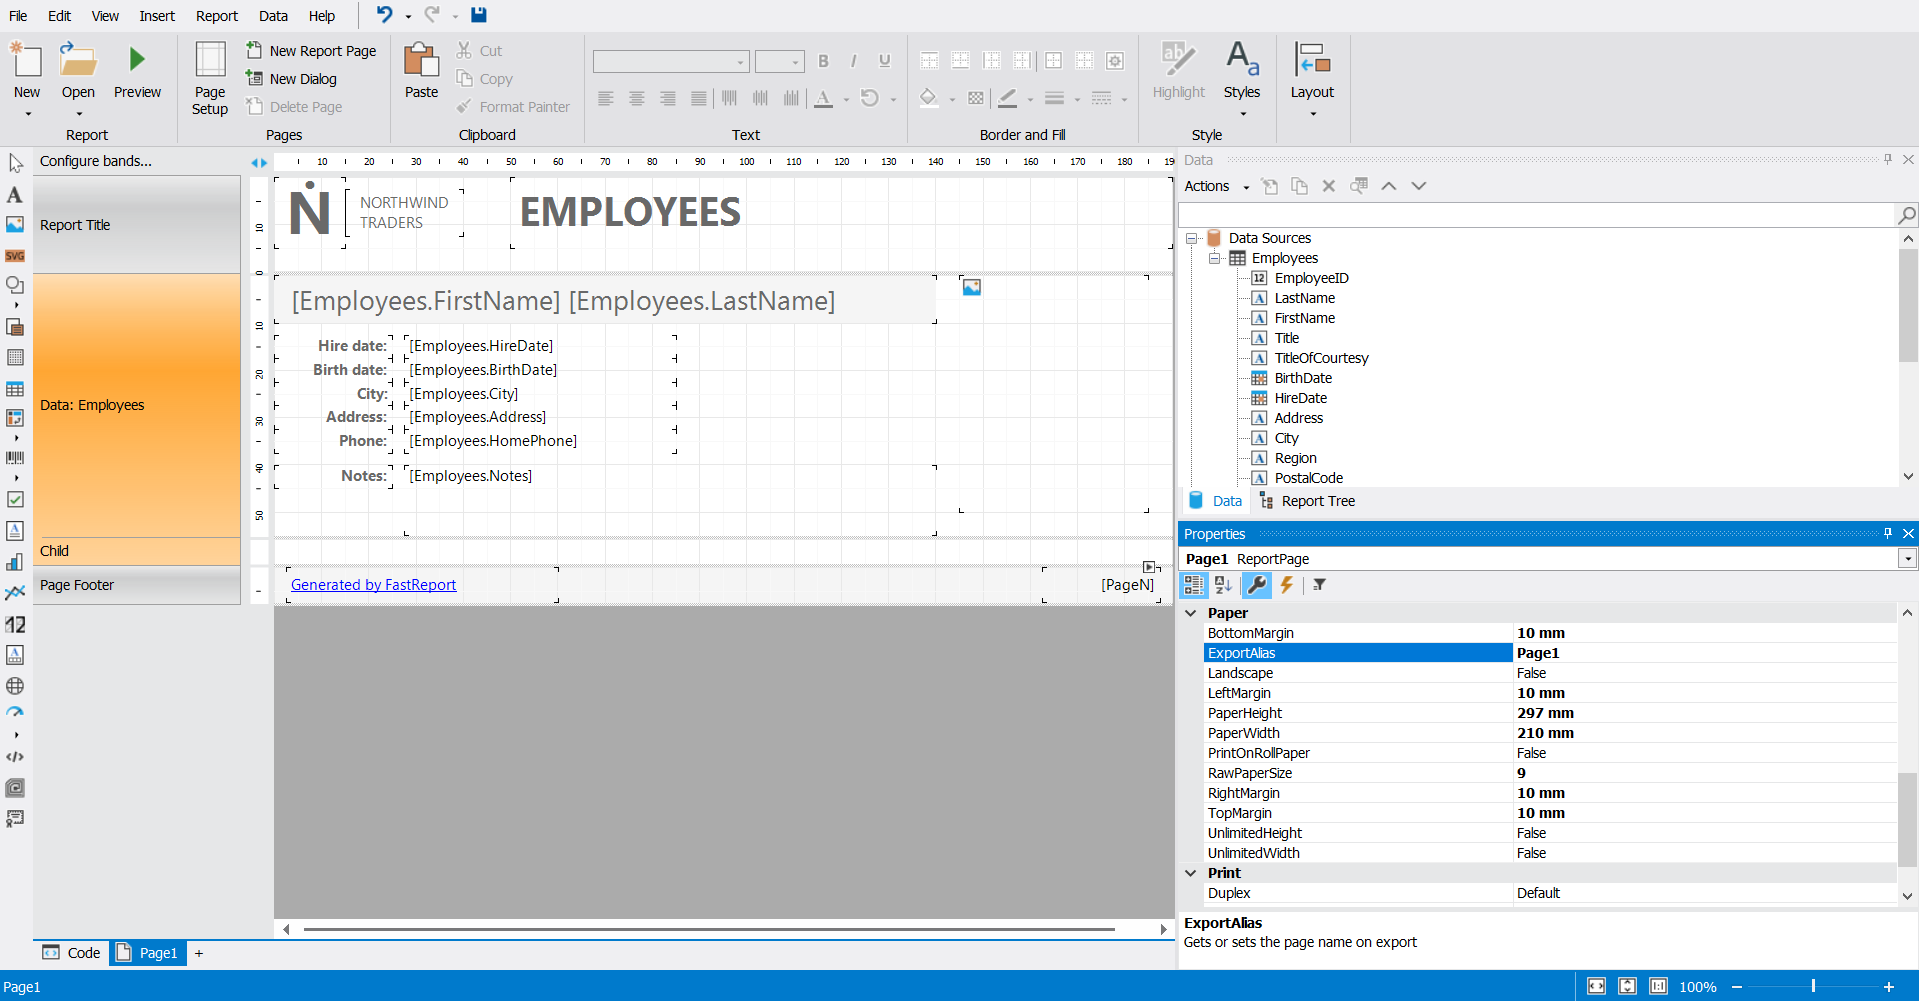
Embeddability in projects
Install the required package from the NuGet repository, or download the package from our website to your computer and add the necessary libraries to the project. No additional modules or special extensions are required.
Lots of components
A variety of elements are available for building reports in the designer: from text and images to mathematical formulas and 3D diagrams.
Quick access to the report and data structure
From the report tree and properties tree, you can edit the report structure, parameters, and filters, as well as data sources with global styles.
Compatibility and integration
WinForms is part of a single FastReport ecosystem in C#. Reports created in other products will work in WinForms and vice versa.
Smooth transition from other solutions
Our report generator instantly converts your reports from List&Label, DevExpress, Microsoft Reporting Services (RDL, RDLC), Crystal Reports, StimulSoft, and Jasper Library into FastReport format.
System.Drawing (GDI)
The familiar System.Drawing with GDI+ graphics functions is used to create graphical elements, render text, and manage graphic images.

Template designer

The standalone desktop report designer is the heart of FastReport. It allows both developers and users to create, edit, view, save, export, and print custom reports without much hassle. The designer can be used at run-time. This will allow your users to independently edit existing documents and create new ones. The designer can also be used in MDI (Multi-Document Interface) mode to work with several reports simultaneously.

Localization is supported for more than 25 popular languages of the world.

FastReport .NET WinForms is a band-oriented report generator. A rich set of bands allows you to build reports of any type: list, master-detail, report with grouping, multi-column, master-detail-detail, and others. If you need to create many reports that contain the same elements (header, footer, company details, logos), then you can collect common elements into a base report and inherit all other reports from it. We also support subreports.

Template designer

Data processing

FastReport .NET WinForms works with ADO .NET data sources. It supports data sorting and filtering, master-detail relationships. Everything can be configured with a few clicks. It is possible to connect to ADO, MS SQL, and XML databases. Connectors are available for connecting to other types of databases, and you can also obtain data from business objects of the IEnumerable type.

Your report may contain data (tables, queries, database connections). This way, you can not only use the data available in your application but also independently connect to any database directly from the report. FastReport .NET WinForms contains a scripting engine that supports C# and VB .NET. You can harness the power of .NET in your report for complex data processing, dialog form management, and more.

The report may contain dialog forms to request parameters before the report is built. Dialog controls support the ability to connect to data and then filter it. Filtering can be added to absolutely any report; it does not require writing any code. Using the visual query builder, you don't need to know SQL to build a complex query from multiple tables.

Data processing

Preview and print

The pre-prepared report can be examined in detail in the Report Viewer's preview window. Our component supports working with parameters, multi-level detailing, and interactive reports. You can define a response to a mouse click on an object in the preview window. For example, you can build and display another report that shows detailed information about the object the user clicked on.

Additional printing settings. The following options are available to you: cutting large report pages into small ones, printing several small pages on one large one, and printing in a given format with scaling. Do you need to print a report containing A3 pages on a regular A4 printer? Now, this is not a problem!

Preview and print

Exports to convenient formats

Filters for exporting the finished report to many formats: PDF, RTF, XLSX, XML, DOCX, TXT, CSV, PowerPoint, HTML, MHT, XPS, JPEG, BMP, PNG, Open Document Format (ODT, ODS, ODP), XAML, Scalable Vector Graphics (SVG), DBF, PPML, etc. Cloud support: OneDrive, Google Drive, Box, Dropbox, FastReport Cloud.

FastReport .NET WinForms allows you to quickly convert reports with editable fields (such as text fields, combo boxes, checkboxes, radio buttons, and graphics fields) into PDF documents without connecting additional libraries. Save your reports in popular formats: PDF 1.5, PDF/A-1a, PDF/A-2a, PDF/A-2b, PDF/A-2u, PDF/A-3a, PDF/A-3b, PDF/X-3 and PDF/X-4, which are secure, accessible and reliable.

Exports to convenient formats

Ultimate .NET

This set of components is part of the Ultimate solution, with which you can create your business projects on all modern .NET, ASP.NET, Blazor, WASM, WPF, WinForms, Avalonia UI, Mono, and other platforms. With your team, you can work both in the desktop designer and directly from the browser. The Ultimate package also includes components for data visualization, namely business graphics with a set of charts and OLAP products for fast processing of large data sets.

Delivery options

Features
from $1,499
Buy
WEB
from $799
Buy
from $499
Buy
FastReport Engine
WEB components
WinForms components
Avalonia components
WPF components
Mono components
Online Designer
FastReport.Drawing (Skia)
System.Drawing (GDI)
Report script engine
Data connections
Reporting features
Report objects
Barcodes
Charts
Printing
Export in formats
Transports
Convertors from
Plugins
Custom plugin support
Source Code

Resent articles

April 08, 2025

How to Set Up a Connection to Apache Ignite in FastReport .NET

  Apache Ignite is a distributed in-memory computing platform that enables the processing and storage of large volumes of data in memory to achieve high performance and scalability. In this article, we will explore how to configure a connection to Apache Ignite in FastReport .NET. You will learn the necessary steps to connect the plugin via code and the report designer. By following our recommendations, you will be able to effectively use Apache Ignite as a data source for your reports in FastReport .NET. The implemented plugin for connecting to Apache Ignite is a lightweight solution based on the Ignite.NET Thin Client.     Apache Ignite Plugin Features Connection to Apache Ignite clusters: The plugin allows you to connect to one or more nodes in the cluster. The node addresses are specified in the host:port format, separated by commas. Working with caches: It supports interaction with caches in both key-value mode and as SQL tables. Authentication: The plugin supports authentication if the authenticationEnabled option is enabled in the cluster configuration. Handling various data types: The plugin ensures proper handling of different data types, including custom objects.     Features of Apache Ignite Implementation Ignite offers two ways to logically represent data: key-value caches and SQL tables (schemas). Despite the differences, these representations are equivalent and can reflect the same data. In Ignite, an SQL table and a key-value cache are two equivalent ways of representing the same internal data structure. Access to the data can be obtained through the key-value API, SQL operators, or both methods. A cache is a collection of key-value pairs, accessed through the key-value API. An SQL table in Ignite is similar to tables in traditional database management systems, but with some additional constraints. For example, each SQL table must have a primary key. A table with a primary key can be represented as a key-value cache, where the primary key column acts as the key, and the other columns in the table are the fields of the object (value).   The main difference between these two data representations lies in the method of accessing them. With a key-value cache, you can work with objects using supported programming languages. SQL tables, on the other hand, support standard SQL syntax, which can be beneficial, for example, when migrating data from an existing database.     How to Connect the Plugin in Your Project To use the plugin, you must first build the project located at:  ..\Extras\Core\FastReport.Data\FastReport.Data.Ignite. After that, the plugin needs to be registered. This can be done in two ways. Method 1. Using Code. Copy the following code and paste it into your project. This needs to be done only once when starting the application. FastReport.Utils.RegisteredObjects.AddConnection(typeof(IgniteDataConnection)); Method 2. Using the Report Designer. To connect the connector in the designer, go to the "File|Settings..." menu in the Ribbon interface (or "View|Settings..." in the standard interface). In the opened window, select the "Plugins" tab and add the built .dll of the plugin as shown below.   After adding the plugin, it is necessary to restart the FastReport .NET designer.     How to Connect a Data Source in the Designer To create a connection to Apache Ignite, go to the "Data" menu and select "Add Data Source."     In the opened window, click on the "New Connection" button, then from the dropdown list of connection types, select the option " Apache Ignite Connection." In the window that appears, specify the address(es) of the nodes, as well as the username and password (if required).   If the connection is successful, the next step will display a list of tables (caches) contained in the nodes specified in the previous step:     Differences When Working with Caches in the Plugin The plugin supports working with caches that are created both as key-value pairs and as SQL tables. The method of creating and configuring a cache in Apache Ignite directly impacts the composition of fields and the representation of data types. Depending on the chosen method (for example, using classes with the [QuerySqlField] attributes, programmatic definition via QueryEntity, or working with dynamic data), the result may vary. This concerns both the list of available fields and their data types. The following code examples will use snippets from the official Apache Ignite functionality examples. These examples can be downloaded from this link in the BINARY RELEASES section:  https://ignite.apache.org/download.cgi.  Let’s open the downloaded archive and navigate to the following folder: ..\apache-ignite-2.17.0-bin\platforms\dotnet\examples\Thin From these examples, we will use the custom class Organization, which represents the data model of an organization. This class contains the following properties: Name: The name of the organization. It is marked with the [QuerySqlField(IsIndexed = true)] attribute, which allows it to be used in SQL queries and creates an index to speed up searches. Address: The address of the organization, represented as a nested object of type Address. This is also available for SQL queries due to the [QuerySqlField] attribute. Type: The type of organization (e.g., commercial or non-profit), represented by the enumeration OrganizationType. LastUpdated: A timestamp indicating when the organization's data was last updated. The complete code for the class can be found in the folder: ..\apache-ignite-2.17.0-bin\platforms\dotnet\examples\Shared\Models     Creating a Cache Using QueryEntity QueryEntity is an Apache Ignite component that allows you to programmatically define the data structure (schema) for a cache and manually specify the fields along with their types. For caches with metadata (QueryEntity), operations for retrieving the list of fields and their data types are supported. Custom data types are handled in the following manner: The list of fields displays only the fields marked with the [QuerySqlField] attribute. Fields are presented in the format data_type.field_name.  For example, if the cache is created during the setup as follows: var organizationCache = ignite.GetOrCreateCache<int, Organization>( new CacheClientConfiguration("dotnet_cache_query_organization", new QueryEntity(typeof(int), typeof(Organization)))); Then, when connecting to an already prepared instance of Apache Ignite in FastReport, the list of fields will include only those fields from the Organization class that are marked with the  [QuerySqlField] attribute.   However, when viewing the data, all fields from the cache will be displayed:   Creating a Cache Without QueryEntity   If the cache is created during the setup without using QueryEntity, then the data types of all fields will be defined as string. Example code:   ICacheClient<int, Organization> cache = ignite.GetCache<int, Organization>("dotnet_cache_put_get"); In the list of fields, all available fields will be displayed, regardless of the presence of the [QuerySqlField] attribute. This is the second method of creating a cache.     Working with Caches Created as SQL Tables Finally, let's consider the third method of working with caches. Here is an example of creating and populating a cache as an SQL table: cache.Query(new SqlFieldsQuery( "CREATE TABLE IF NOT EXISTS city (id LONG PRIMARY KEY, name VARCHAR) WITH \"template=replicated\"")).GetAll();   const string addCity = "INSERT INTO city (id, name) VALUES (?, ?)"; cache.Query(new SqlFieldsQuery(addCity, 1L, "Forest Hill")); cache.Query(new SqlFieldsQuery(addCity, 2L, "Denver")); cache.Query(new SqlFieldsQuery(addCity, 3L, "St. Petersburg")); For such caches, the metadata (QueryEntity) contains information about the data types for each field.   In an Apache Ignite cache, data may be stored without explicitly defined field names. For example: var cache = ignite.GetOrCreateCache<int, object>("put-get-example");   int key = 1; var val = new Address("1545 Jackson Street", 94612); cache.Put(key, val);   int key1 = 2; var val1 = 942.28956; cache.Put(key1, val1);   int key2 = 3; var val2 = "test String"; cache.Put(key2, val2); When connecting to an instance of Apache Ignite in FastReport (with the code from the example above), you will see the following result. In this example: The fields Street and Zip from the custom class Address have names, as they are defined in the structure of the class. Values such as the number 942.28956 or the string "test String" do not have names, as they are added to the cache as simple key-value objects. For fields that lack a name, unique identifiers are generated.     Conclusion We’ve covered how to set up a connection to Apache Ignite in FastReport .NET. By following the steps outlined, you’ll be able to integrate these systems and take full advantage of Apache Ignite as a data source for your reports. Apache Ignite provides fast data access and processing, while FastReport .NET enables the creation of powerful reports. Their integration opens up new opportunities for data analysis and visualization. We hope this article has been helpful and will assist you in effectively using Apache Ignite in your projects with FastReport .NET.
Read
April 08, 2025

Converter from Microsoft Word (.docx) format to FastReport .NET (.frx) file

Modern data processing technologies and document workflow automation require the integration of various file formats to ensure seamless interaction between software products. With its extensive capabilities, Microsoft Word has become one of the most popular text editors, suitable for a wide range of tasks. At times, you may need to convert these documents into formats specific to other applications. For instance, there are situations where you need to convert Microsoft Word files into the FastReport .NET format, which is used for creating report templates when working with FastReport.     How to Compile the Project First, open the .sln file named FastReport.OOXMLImportPlugin.sln. Note that there are two such files for Visual Studio 2017 and above. Then, remove the references to the FastReport and FastReport.Bars projects as shown in the screenshot below.   After that, you need to add a reference to FastReport.dll. This DLL is located in the same folder as the Designer.   Right-click in the workspace and click "Build." After that, navigate to the path FastReport.OOXMLImportPlugin\bin\Debug\net472 and you will find the compiled file “OOXMLImportPlugin.dll” in that folder.   How to Register the DLL in FastReport You can do this in several ways. Method 1: Register using the FastReport Development Environment Open the report designer, then go to the "File|Settings..." menu in the Ribbon interface (or "View|Settings..." in the standard interface).   Next, in the "Plugins" tab, add FastReport.OOXMLImportPlugin.dll.   After that, restart the FastReport .NET designer. If you are working in the Visual Studio IDE, be sure to restart it as well. Once the designer is launched again, click "File|Open" and select "Microsoft Word Document (*.docx)" from the list of available files, as shown in the screenshot below.   Select the desired *.docx file to import into FastReport .NET. As a result, you will see the imported file in the designer.     Method 2: Manually Edit the FastReport.config File By default, this file is located in the folder C:\DocumentsandSettings\user_name\Local Settings\Application Data\FastReport. Make sure to close all running instances of FastReport .NET. Only after that, open the configuration file in any text editor and change it as follows: <?xml version=«1.0» encoding=«utf-8»?> <Config> ... <Plugins <Plugin Name=«c:\.....\ OOXMLImportPlugin.dll»/> </Plugins> </Config     Method 3: Register the DLL Programmatically For this, you will need to add an "OOXMLImportPlugin.dll" reference in your project, as shown below.     Then, execute the following code once when the application starts: FastReport.Design.DesignerPlugins.Add(typeof(FastReport.Design.ImportPlugins.OOXML.DocxImportPlugin));     How to Register the NuGet Package FastReport.Plugins.OOXMLImport in FastReport First, install the NuGet packages FastReport.Net and FastReport.Plugins.OOXMLImport from our private NuGet server. Installation instructions are available at this link.    Next, you need to register the plugin using the following code:   FastReport.Design.DesignerPlugins.Add(typeof(FastReport.Design.ImportPlugins.OOXML.DocxImportPlugin));   Run the application, then click "File|Open" and select "Microsoft Word Document (.docx)."   Select the desired *.docx file to import into FastReport .NET. As a result, you will see the imported file in the designer.   Known Limitations as of the Release of Version 2025.2.0 As of now, our plugin does not support background highlighting of part of a line, shapes, as well as nested vector graphics (Vector Markup Language, VML), and OLE objects.Sometimes, empty pages are added to the resulting report. If you encounter this issue, please contact our technical support at support@fast-report.com.     Conclusion Thus, the developed converter from .docx to .frx is an important step in simplifying the automation of document handling processes and report generation. It significantly reduces the time required to create report templates by using ready-made Word files.  It’s important to remember that the structures of the two file formats are different and cannot just be swapped into one another. You need to take into account the file structures and adjust everything to fit the required format to ensure that the data is accurate and the formatting is preserved. For guidance on how to prepare the document so that it retains its proper structure, please refer to this material.
Read
March 25, 2025

How to Merge Multiple Reports into One in FastReport .NET

FastReport .NET is a powerful tool for creating and managing reports, widely used in various fields. It provides developers with the ability to create complex and professional reports using a multitude of features and capabilities. One of the key features of FastReport .NET is the ability to merge multiple reports into one. This can be useful where you need to combine data from different sources or present information in a more convenient format. In this article, we will discuss how to merge multiple reports into one in FastReport .NET. Open the FastReport .NET report designer and load your report.   Once the designer is open, select the “File” menu and then “Open Page.”   In the file system, select the report that you want to merge with the first one and load it.   Now, choose the required page and click OK. Starting from FastReport .NET version 2025.1, you can enable the “Add as Link” option, which means that the report will include a link to the page rather than a copy of it. This means that if the page is changed in the original report, the changes will be reflected in all reports where the page has been added as a link. Conversely, if the page is modified in one of the reports that link to it, it will be changed in the original report as well.   If everything went successfully, you will have access to the added pages from the selected template at the bottom of the designer.   To merge them into a single report, you can save the current modified template, or save it as a new template. To do this, select the “File” menu and then “Save As.” Save the new report under a new name.   In this article, we have covered in detail how to merge several reports into one in FastReport .NET. We explored the main tools and methods that FastReport .NET provides for merging reports, as well as how to use them effectively.
Read
Fast Reports
  • 800-985-8986 (English, US)
  • +31 97 01025-8466 (English, EU)
  • +49 30 56837-3928 (German, DE)
  • +55 19 98147-8148 (Portuguese, BR)
  • info@fast-report.com
  • 66 Canal Center Plaza, Ste 505, Alexandria, VA 22314

© 1998-2025 Fast Reports Inc.