How to create the invoice from ASP .NET Core
Few believed in the success of the new open-source ASP.Net Core framework from Microsoft. It’s all because of the low popularity of the previous ASP.Net platform. However, very soon everyone appreciated the advantages of the new cross-platform framework. Nowadays ASP.Net Core occupies a high position in the ranking of the best frameworks for web development. Many web applications, websites and online stores are created using it. When selling goods, online stores must provide the customers with some documentation. For example, the payment invoice.
The payment invoice is one of the documents often required for non-cash payments. Therefore, if you are creating an online store or other sales system, you will have to provide your customers with invoices.
To render the invoice, first we need to develop a document design, fill it with data and send it to print. The best solution would be to use a report generator to create a document template and populate it with data. The task of the user application is to display the desired report.
There is no clear requirement for issuing invoices – there are only recommendations that help to avoid customer misunderstanding. Going forward, we will consider the invoice that we will create in this article so that you have an understanding about how to process the invoice issuing. Of course, we don’t say that this template is the best.
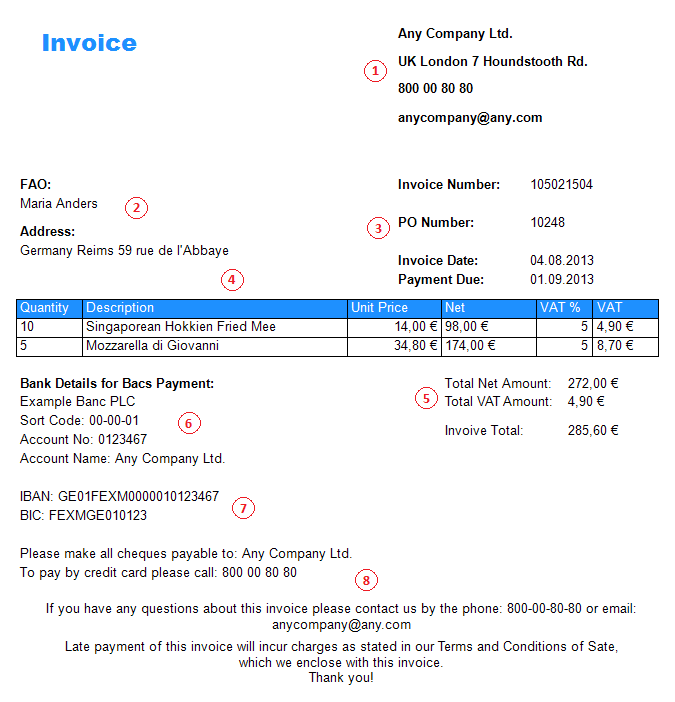
This figure highlights important areas of the document. Let us explain their essence:
- Information about the seller. Any official document should contain information about the seller: name, address, phone, email, additional information (optional);
- Information about the contact person of the buyer – it is necessary to indicate the person actually responsible for the payment;
- Order and invoice identifiers, invoice issuing and due dates. These identifiers will help to find an invoice or order in the database, in case a customer has any questions later;
- Information about the order content. Your customer must understand what he pays for. It is necessary to specify the name and quantity of the goods, as well as the cost per unit;
- The total amount. Total amounts are necessary not only for making a payment but also for understanding the calculation;
- Payment details. Since this is a payment invoice, if should contain the payee details;
- Bank details for abroad payments. Even if, in this case, the customer is not from abroad, you can leave this data for a unified form;
- Explanatory information. It is important to provide contact details in case of questions. You should also warn about the consequences of late payment. This will engage the customer to not delay it.
So, the FastReport.Net report generator comes as a set of libraries. In this article, we are considering the capability to output invoices in an ASP.Net Core application. Therefore, the FastReport.Core libraries will be used. In fact, we do not need an application to issue an invoice. All we need is a report generator and data. But the ability to create a document is hardly interesting to anyone. It is important to be able to integrate reporting systems into user programs so that reporting is a part of a single data processing system. Therefore, first we will create a report template, and then we will use it to display data in a web application.
Create a report in the designer. You must have seen payment invoices many times – there is nothing complicated in the template of such a report. Take a look:
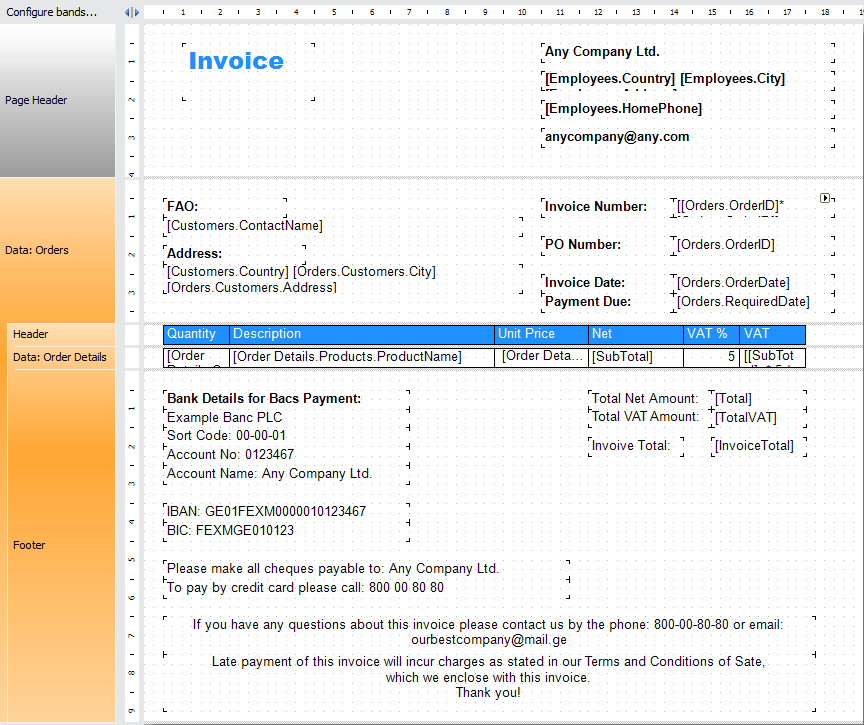
In this case, the data is taken from four tables: Order, Order Details, Customers and Products.
The main band – Data – is linked to the Orders table. This means that for each table entry a new instance of this band will be formed. In addition to the information about the order on the right we display the customer information on the left. The Customers table is linked to the Orders table by id.
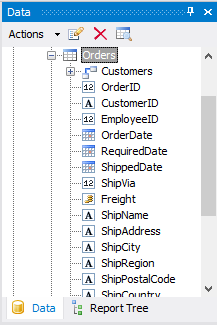
So, to provide the correspondence of the data from customer information and the current order, it should be taken from the link. The Order Details table has the same relationships to Orders and Products tables.
The order information is displayed in the Data band. It is linked to Order Details table. In one line it displays: quantity, product name, unit price, price for the specified quantity, tax rate and amount of tax. A Data band has header and footer bands. The table header is displayed in the header band, when the totals, payment details and explanatory information are displayed in the footer band.
Subtotals are calculated within a single table record by multiplying or summarizing the table fields in the text field:
[[SubTotal] * 5 / 100]
Or, using the report variables:
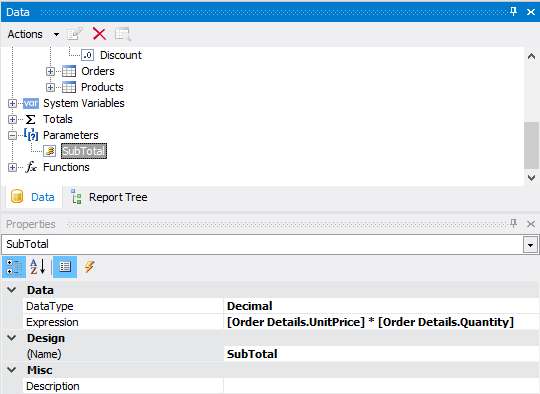
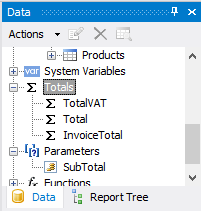
Totals, that are calculated according to the column using a special expression – Totals:
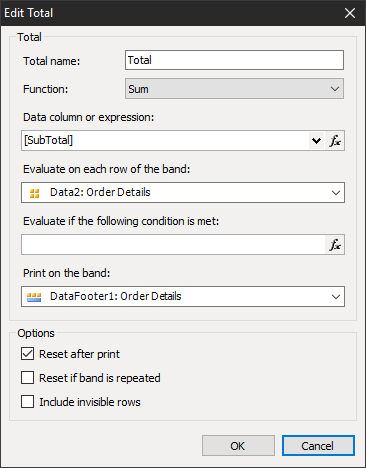
Each Total has settings – type of operation, table field or expression, band (where the Total will be displayed), etc.
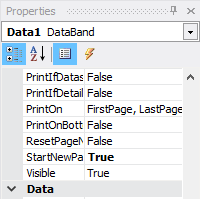
If data implies rendering several invoices at once, it is necessary to render each invoice on a separate page. To do so, you need to include the StartNewPage = True property in the DataBand:
This completes the most difficult part – creation of the report.
Now let’s move on to our ASP.Net Core application. You need to add FasReport.Net libraries to your project using NuGet:

Connect the FastReport libraries in Startup.cs:
1 2 3 4 5 6 |
public void Configure(IApplicationBuilder app, IHostingEnvironment env) { … app.UseFastReport(); … } |
Now you can add report generation to the controller:
1 2 3 4 5 |
private IHostingEnvironment _env; public HomeController(IHostingEnvironment env) { _env = env; } |
Inject IHostingEnvironment interface into the class to get path to wwwroot directory where we saved the report. Create the report object in the method you need, load data and a report template into it:
1 2 3 4 5 6 7 8 9 10 11 12 |
public IActionResult Index() { var rootpath = _env.WebRootPath; var report = new WebReport(); var data = new DataSet(); data.ReadXml(rootpath + "/App_Data/nwind.xml"); report.Report.Load(rootpath + "/App_Data/Invoice.frx"); report.Report.RegisterData(data); ViewBag.WebReport = report; return View(); } |
Add the report render to the Index view:
1 |
@await ViewBag.WebReport.Render()
|
Render() method exports the report to html.
Now, if you run the application, you will see your report in the browser:
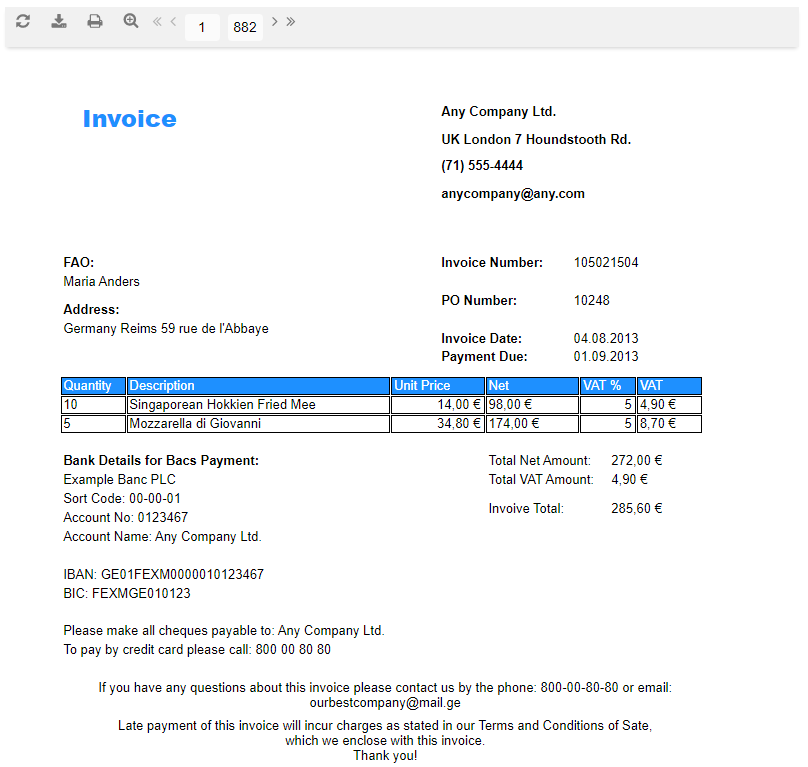
Thus, you can quickly create a payment invoice from your web application. Look at the top toolbar. It contains the report controls that allow you to not only view the report pages but also send it to print or export it to one of the popular document formats: PDF, DOCX, XML, XPS, ODT, TXT, CSV, RTF.
From the web report menu, you can print it or export to the desired format.