How to use FastCube .NET in Vue SPA application
The Vue.js framework is currently very popular and stands in line with Angular. We have already considered how to use FastReport.Core in Angular application. Now let us consider how to implement the display of a FastReport web report in a single-page application on Vue.js with backend on ASP .NET Core.
For that, we need to install Node.js and, as minimum, NET Core SDK 2.0; however, a newer version is even better. By default, dotnet sdk does not have a vue application template. But it can be installed! To do that, create a catalog, in which your application will be placed, and run the PowerShell command line in it. This can be done from the context menu, which is invoked by a right button click on the empty space in the directory with the pressed shift button.
Input the command in the command line:
dotnet new — install Microsoft.AspNetCore.SpaTemplates::*
Then you will have the Vue template available for generating a demo application. Use it to create the application with a command:
dotnet new vue -o FRCubeVue
After creating the application you will see a warning that the following command must be executed:
npm install
But before executing it, you should go to the created catalog:
cd FRCubeVue
After all the necessary packages are installed, open the project file .csproj.
Now we must add FastCube libraries into the project we had created, but first they should be assembled from the source codes. For that, use the FastCube.Core.sln solution. After the assembling you will get two Nuget packages: FastCube.Web.2020.2.1.nupkg and FastCube.Core.2020.2.1.nupkg. Place them into one directory, which will be used as a local package source later.
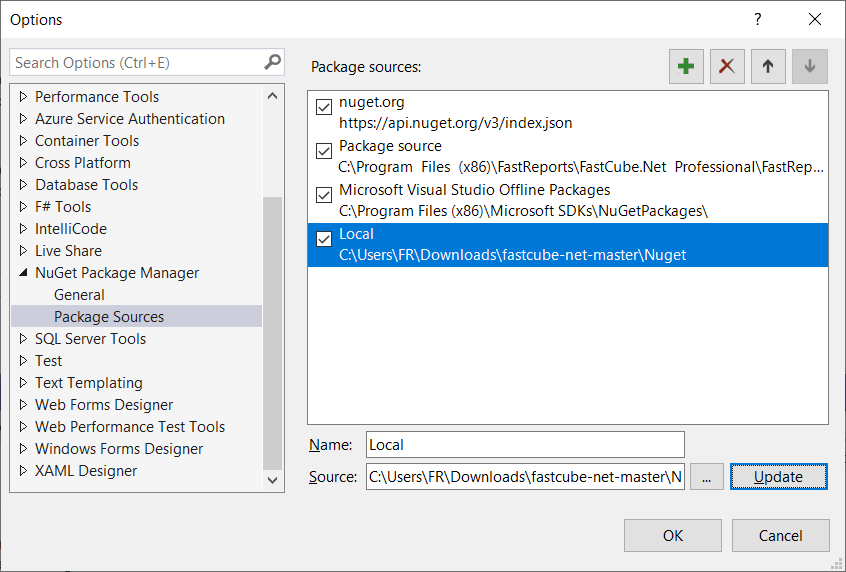
Now we start adding packages into the project with the help of NuGet package manager. It is to be recalled that the packages are stored locally. To enter the settings, click the gear icon in the upper right corner of the package manager and add a new source, which will refer to the local directory with your nupkg packages:
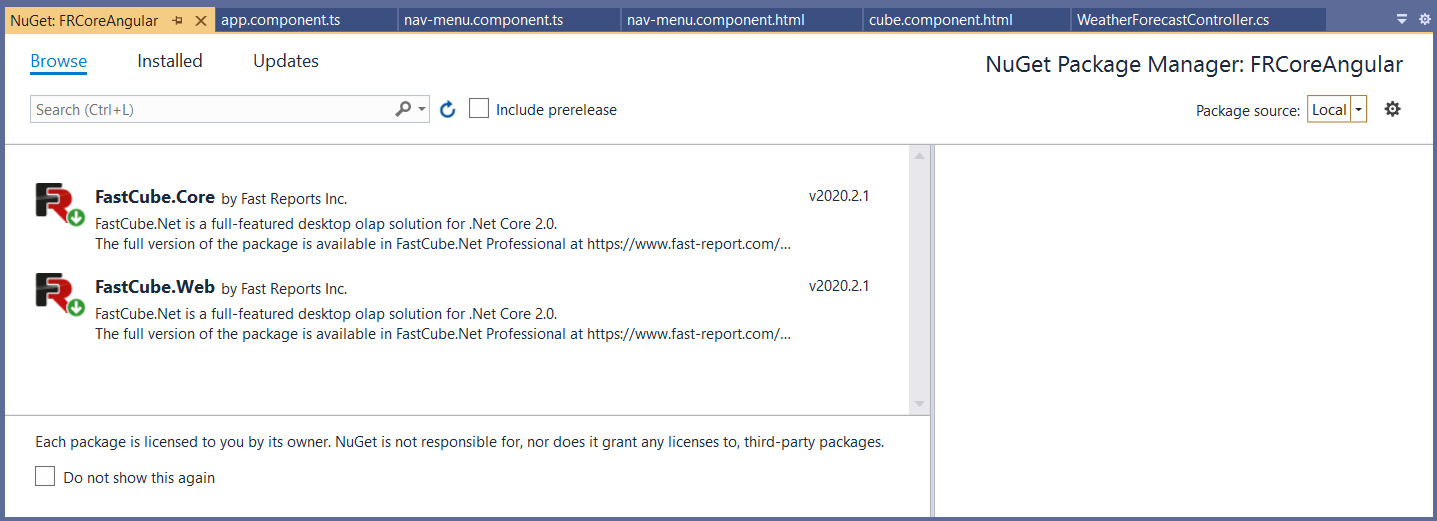
Select the added source of packages in the drop-down list and install the packages:
Plug in FastCube in Startup.cs file Configure() method by adding a code:
app.UseFastCube();
The standard template-based application is ready for start and contains a controller and view. We can use it to display our data cube. Now add a new method to
 [HttpGet("[action]")]
 public IActionResult ShowCube()
 {
 Cube cube = new Cube();
 Slice slice = new Slice()
 {
 Cube = cube
 };
 FilterManager filterManager = new FilterManager()
 {
 Cube = cube
 };
 WebGrid grid;
 grid = new WebSliceGrid()
 {
 Slice = slice
 };

ViewBag.WebGrid = grid

 cube.SourceType = SourceType.File;
 cube.Load(Path.Combine("C:\\Users\\FR\\Downloads\\fastcube-net-master\\Demos\\Data\\", "Cubes", "calculated_measures.mdc"));
 return View(model);
 }
Let us consider this technique in more detail. Here we use the objects of Cube and Slice. To display data, we use the object WebGrid, which can receive data from a cube or a slice via the corresponding inhering objects WebCubeGrid and WebSliceGrid. In this case, we will display a slice, thus, the second object is selected. Then we download the existing cube from the file.
For the added ShowCube method, we have to create a display - ShowCube.cshtml.cs with a single code line:
@await ViewBag.WebGrid.Render()
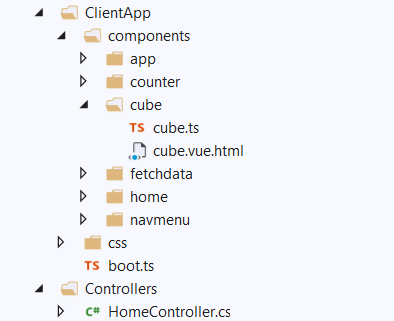
Now we pass to the SPA application. As we have created the project with a template, it already contains a demo single-page application. Thus, all we have to do is to add a new component and set the menu. Two new files must appear in the application structure:
The file cube.vue.html is the html display of the new component:
The display formed in the ASP .Net Core application will be downloaded in iframe.
The file cube.ts is the script of the new component:
import Vue from 'vue';
import { Component } from 'vue-property-decorator';

@Component
export default class CubeComponent extends Vue {
 url: string = '';
 show: boolean = false;
 cubeData: string ='';

 Clicked() {
 this.show = true;
 this.url = "api/SampleData/ShowCube";
 }
}
In the script we set url for the iframe source as a button click.
At this stage, the new component must be registered in the file boot.ts:
const routes = [
 ...
 { path: '/cube', component: require('./components/cube/cube.vue.html') }
];
Also, we add the new menu header in the file navmenu.vue.html:
<template>
 <div class="main-nav">
 <div class="navbar navbar-inverse">
 <div class="navbar-header">
 <button type="button" class="navbar-toggle" data-toggle="collapse" data-target=".navbar-collapse">
 <span class="sr-only">Toggle navigation</span>
 <span class="icon-bar"></span>
 <span class="icon-bar"></span>
 <span class="icon-bar"></span>
 <span class="icon-bar"></span>
 </button>
 <a class="navbar-brand" href="/">FRCubeVue</a>
 </div>
 <div class="clearfix"></div>
 <div class="navbar-collapse collapse">
 <ul class="nav navbar-nav">
 <li>
 <router-link to="/" :exact="true">
 <span class="glyphicon glyphicon-home"></span> Home
 </router-link>
 </li>
 <li>
 <router-link to="/counter">
 <span class="glyphicon glyphicon-education"></span> Counter
 </router-link>
 </li>
 <li>
 <router-link to="/fetchdata">
 <span class="glyphicon glyphicon-th-list"></span> FETCH data
 </router-link>
 </li>
 <li>
 <router-link to="/cube">
 <span class="glyphicon glyphicon-th-list"></span> Cube
 </router-link>
 </li>
 </ul>
 </div>
 </div>
 </div>
</template>

<style src="./navmenu.css" />
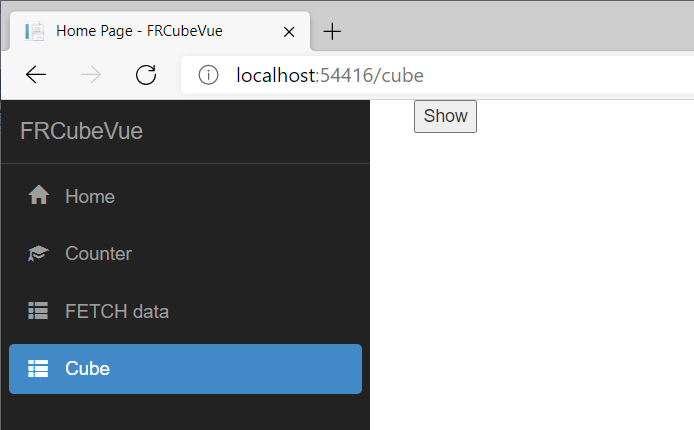
Now our application is ready to start. Let us do it:
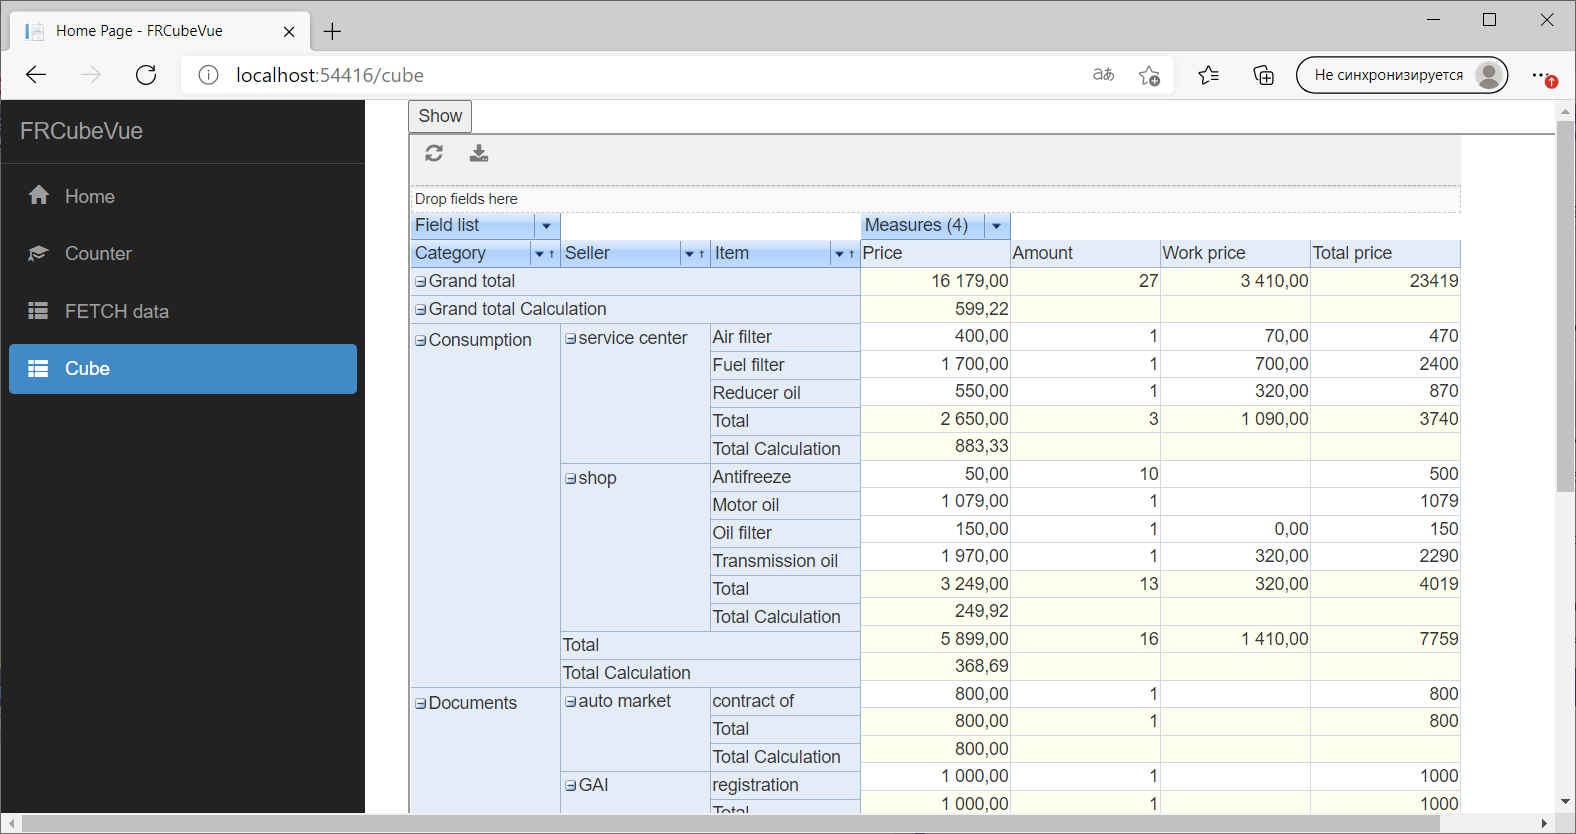
Press the button and see your cube:
As you can see, both the server and the client parts are rather simple. Now you may use OLAP cubes in your web applications without paying more for every unit of a desktop application.
