Generating reports in SAP NetWeaver with FastReport.Net – Part 1
Part 1: Rapid report development
Landscape:
- SAP NW 7.31 or higher
- Workstation with SAP GUI for Windows
- Fast Report.Net components installed on SAP NW
Task:
Build report for the current stock of materials. EPM Demo data model is data source for report.
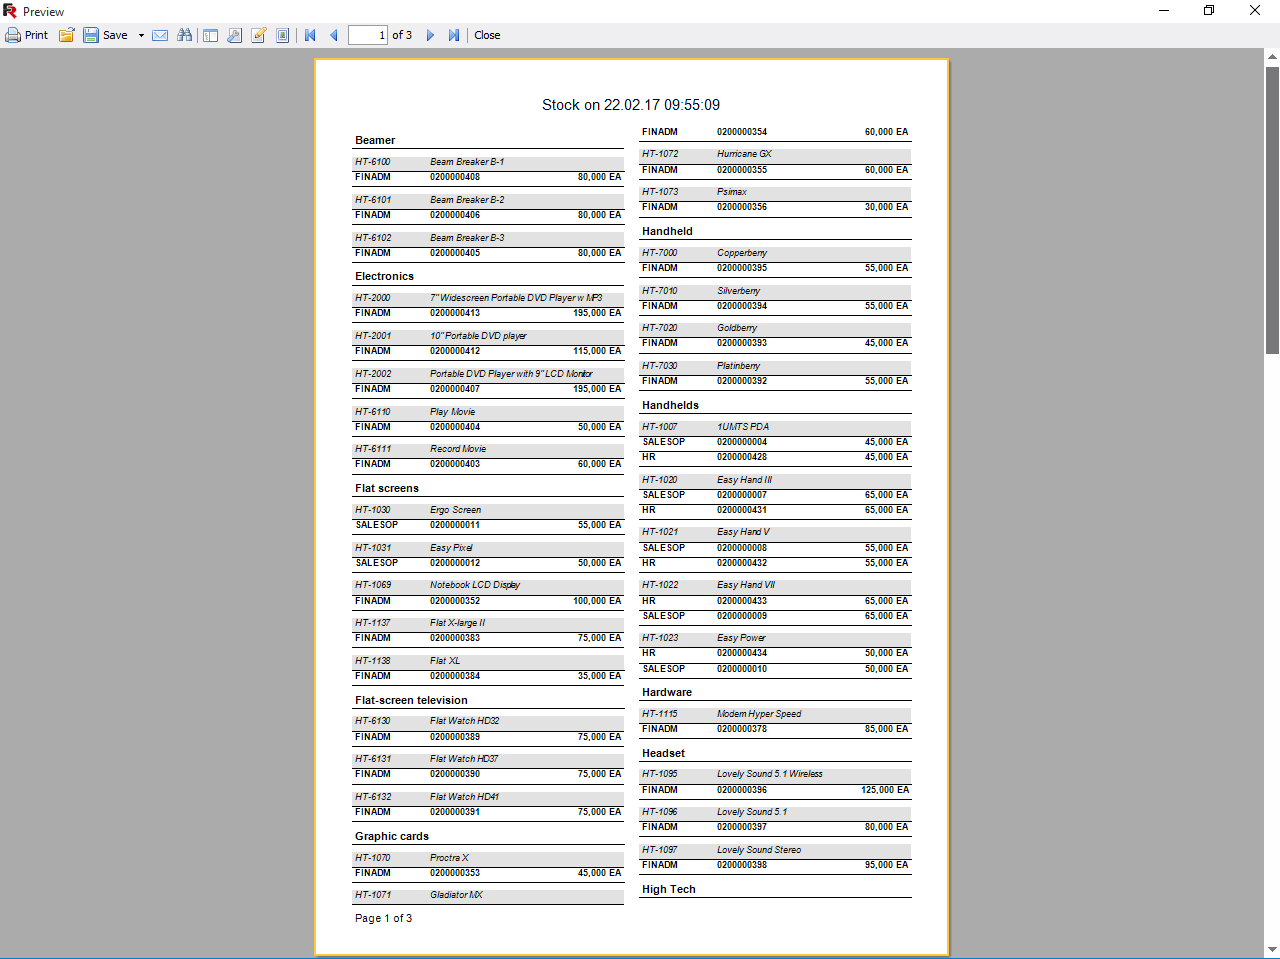
Final report example:
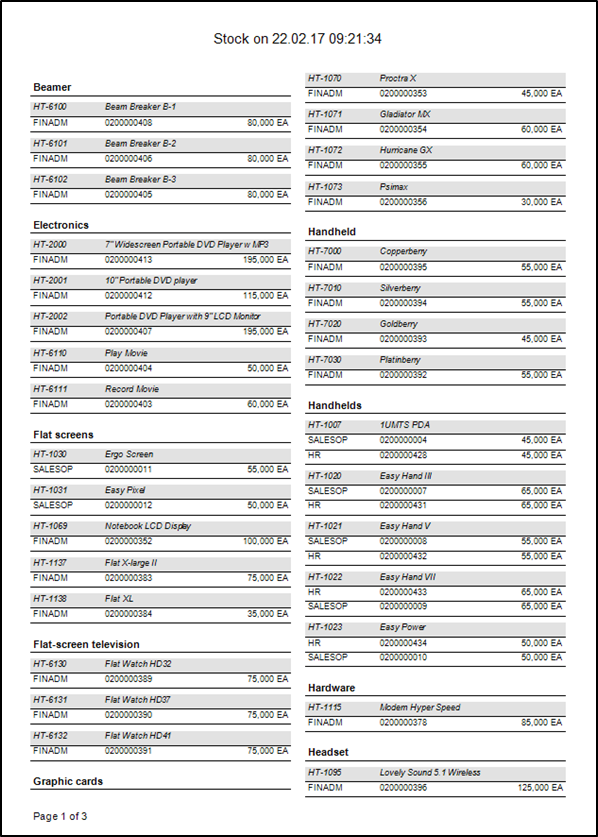
Prepare Data source.
We need to use SAP Query for report data source to be able to create new report.
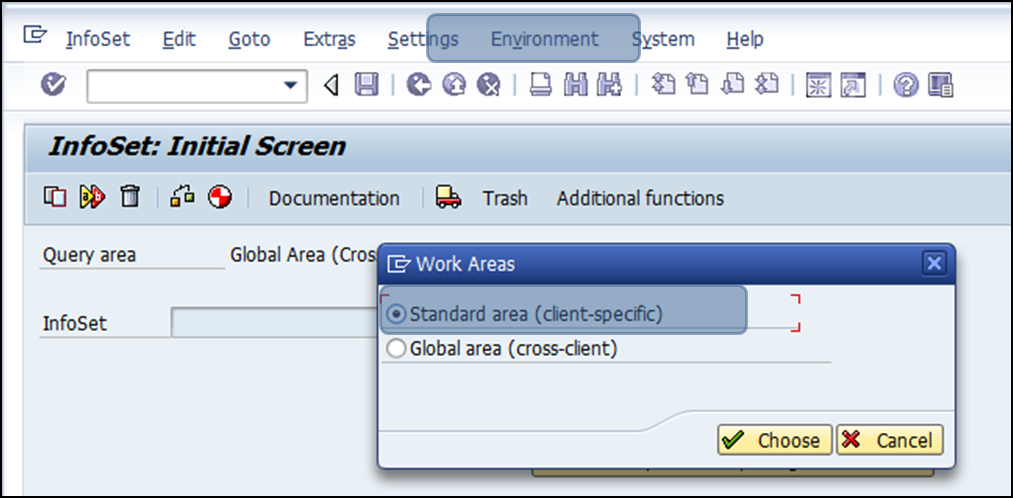
Run transaction SQ02 and switch namespace to local (we will use local namespace as it will not require transport requests and you even can build queries directly in production system)
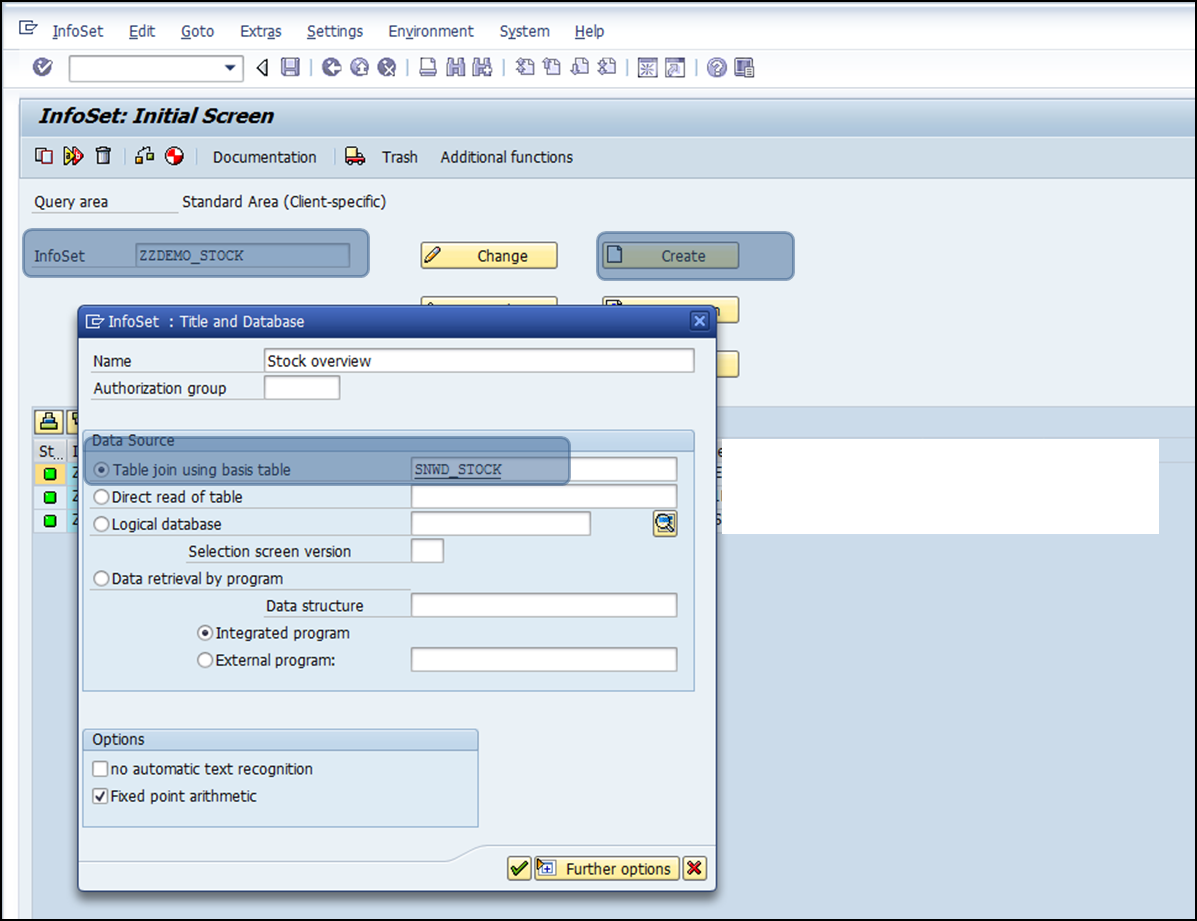
Create new Infoset ZZDEMO_STOCK and choose table SNWD_STOCK as basis table.
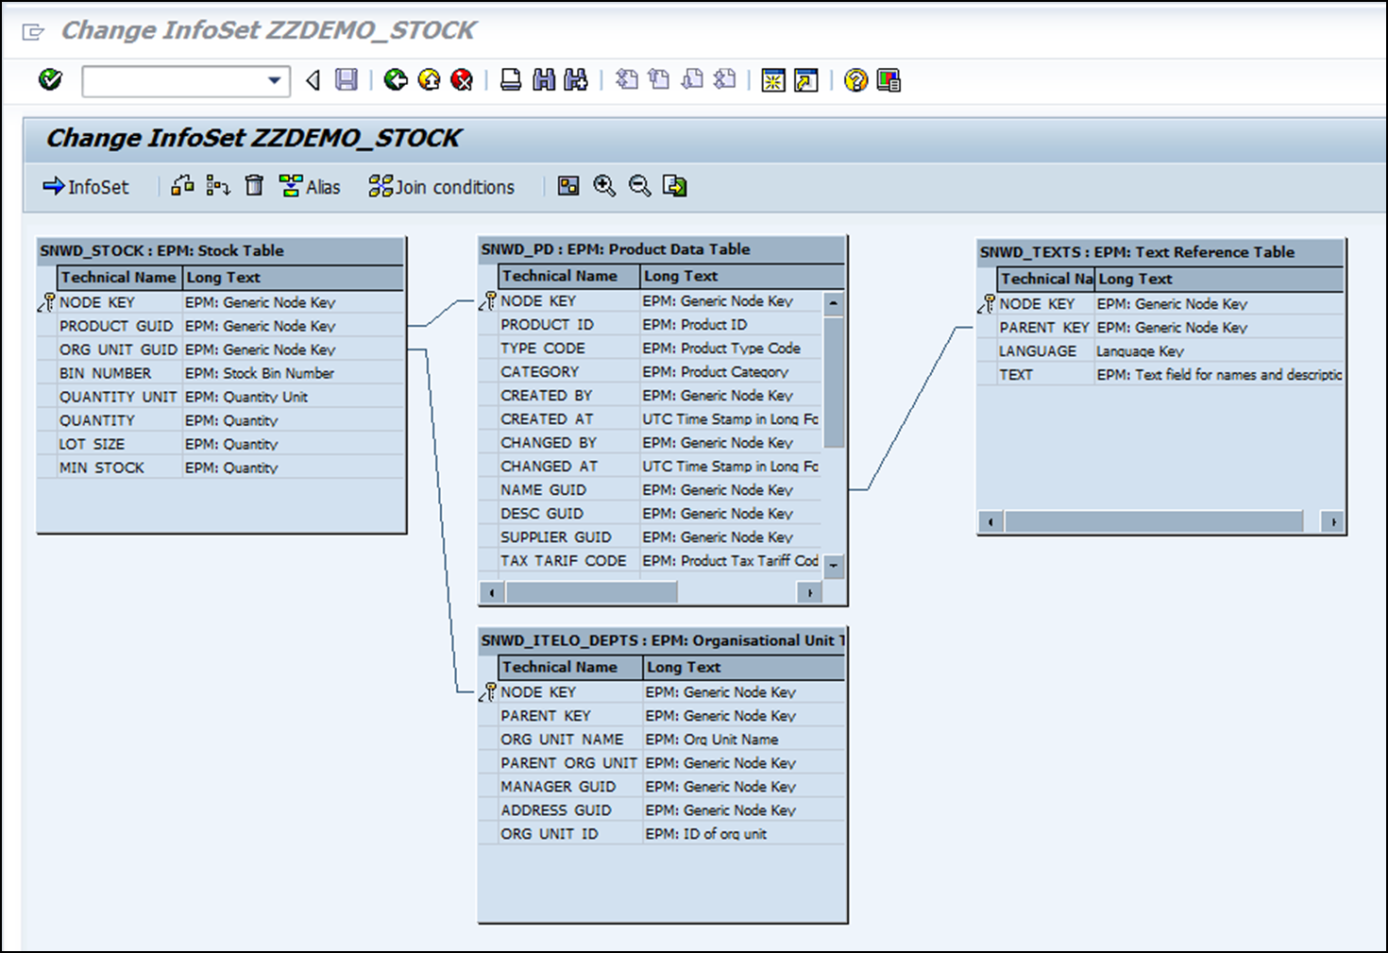
Add tables and join them as shown on the screen
Press on “Infoset” button. On overview screen add (drag and drop) data fields to new result field group.
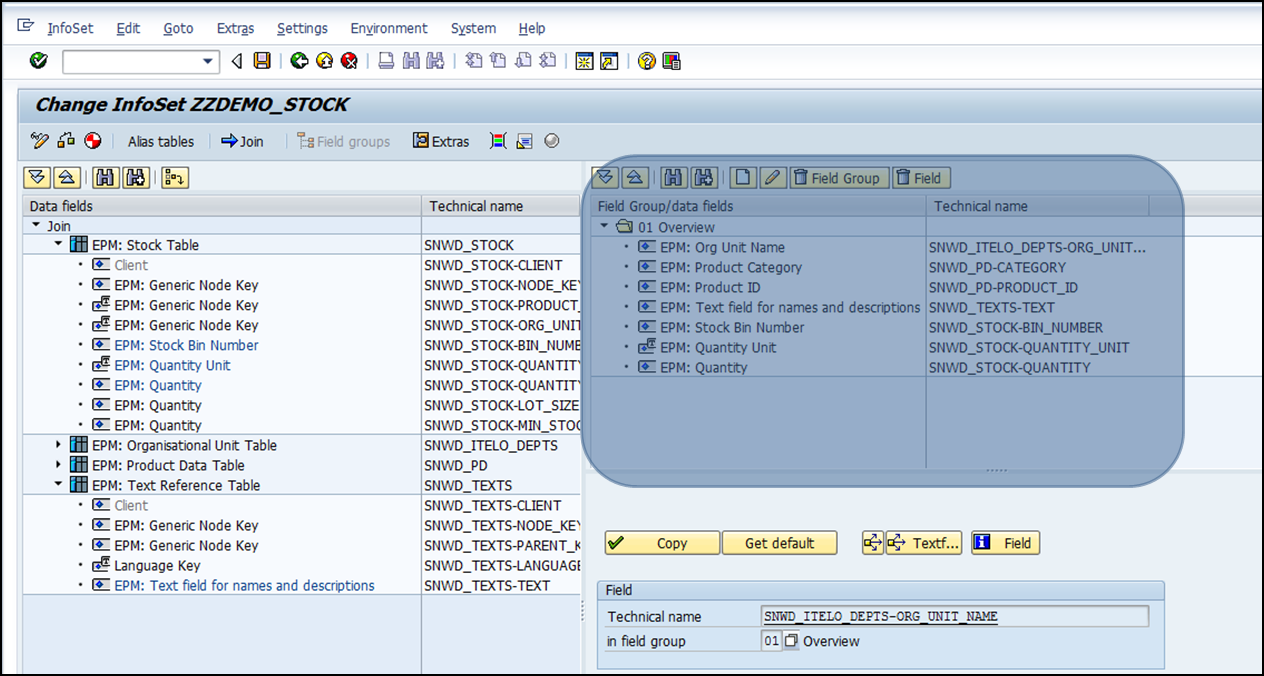
Save and generate infoset.
Run transaction SQ03 and create new user group “ZZDEMO_FR Reports “. Assign infoset ZZDEMO_STOCK to user group.
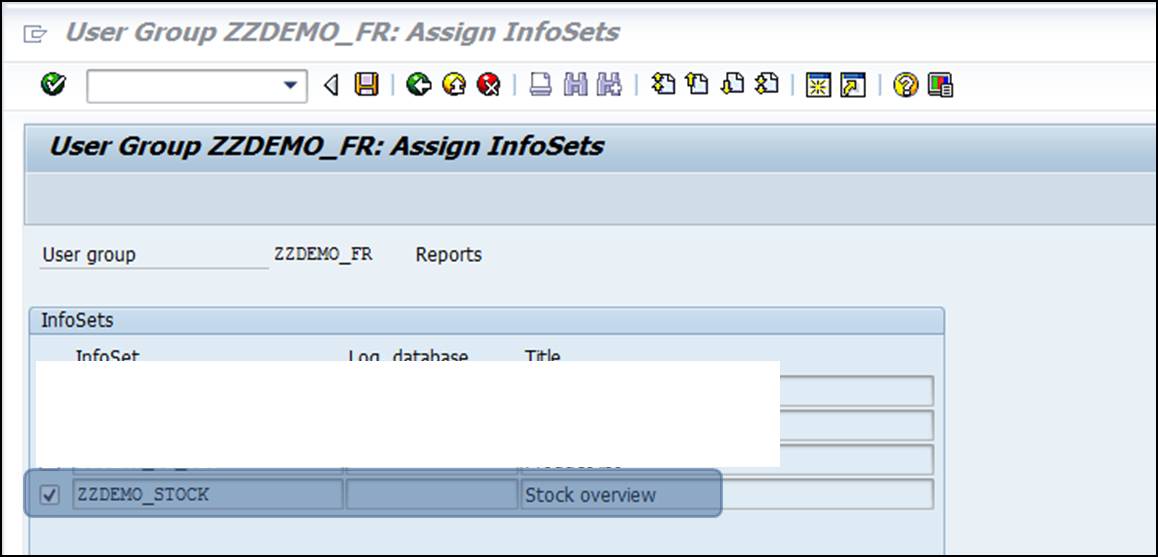
Save user group.
Preparing template
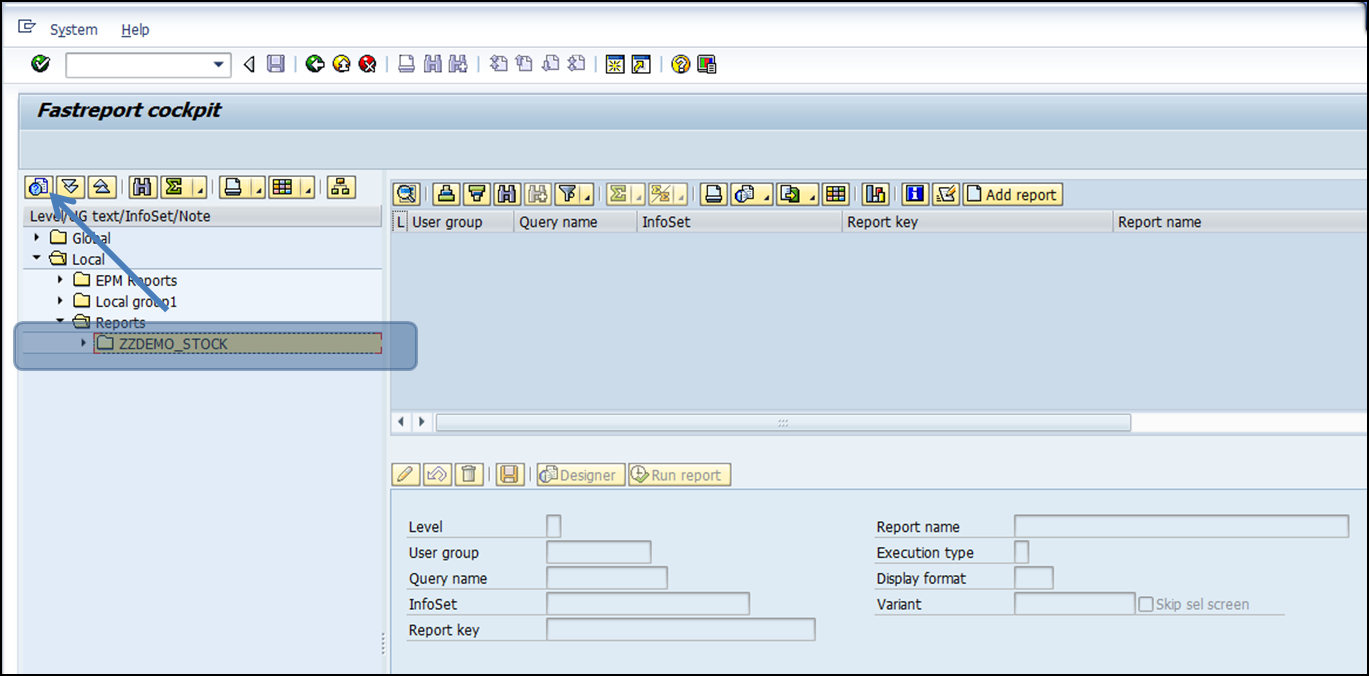
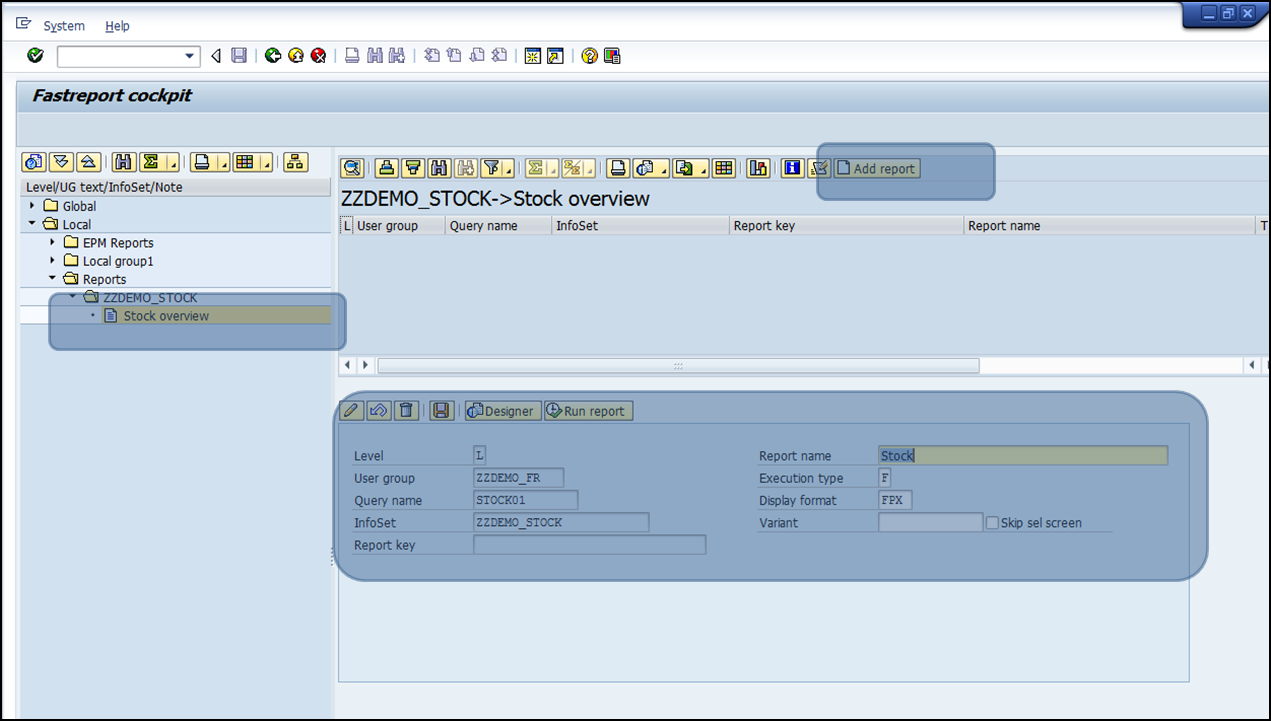
Now let’s move to Fast report! Run transaction ZFR_COCKPIT. On the left panel select node Local->Reports-ZZDEMO_STOCK and then press button “Call query” to run Infoset Query.
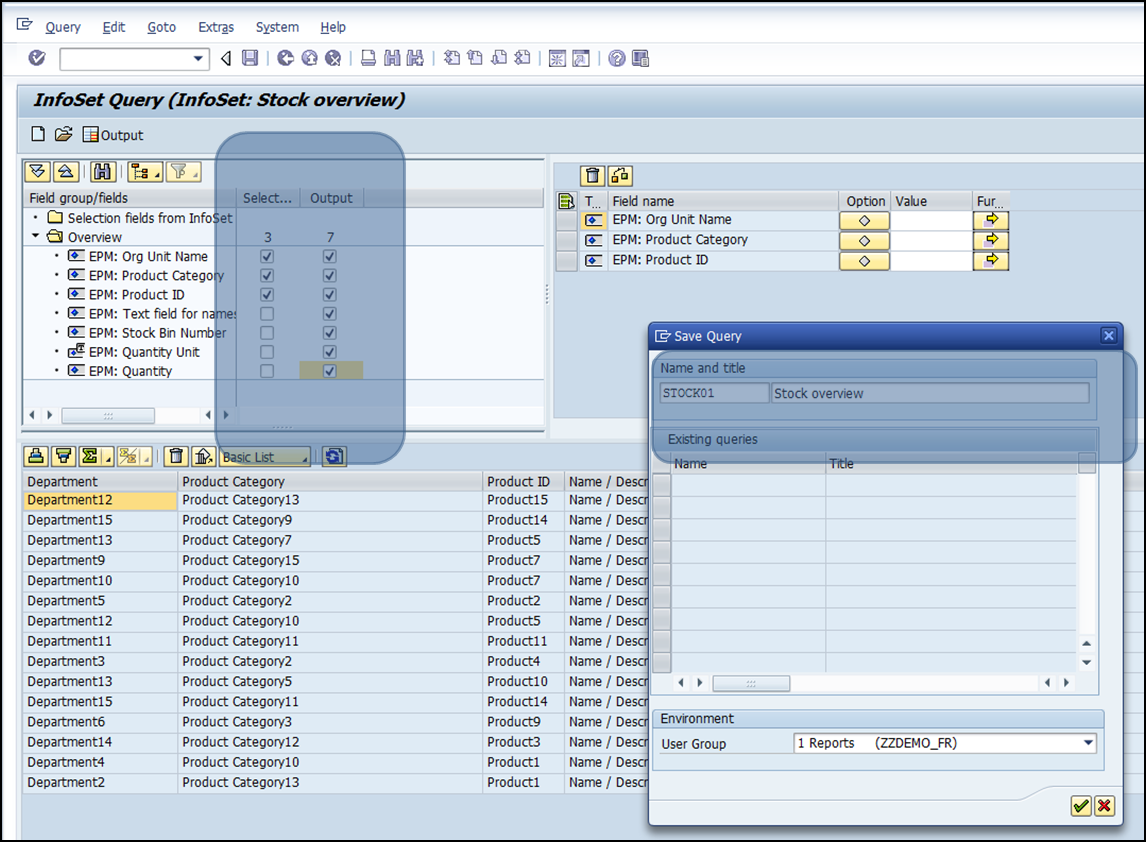
Mark fields relevant for selection screen and report data source. Save query with name “Stock01- Stock overview”.
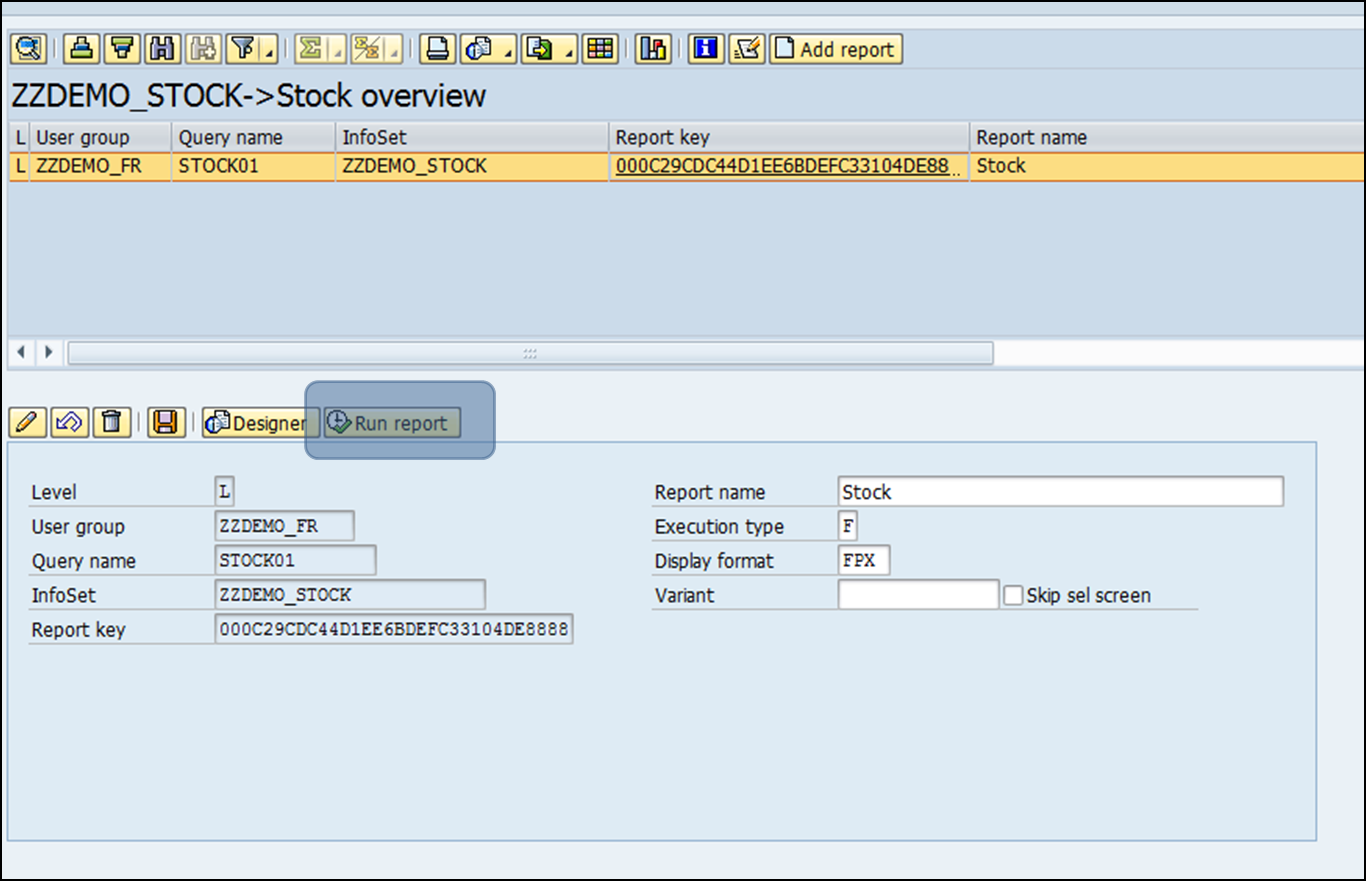
After save and return new query will appear in the tree. Now press on it and on the right top panel press “add report”. On the bottom screen maintain report parameters, set running type as “Run on frontend” and save data.
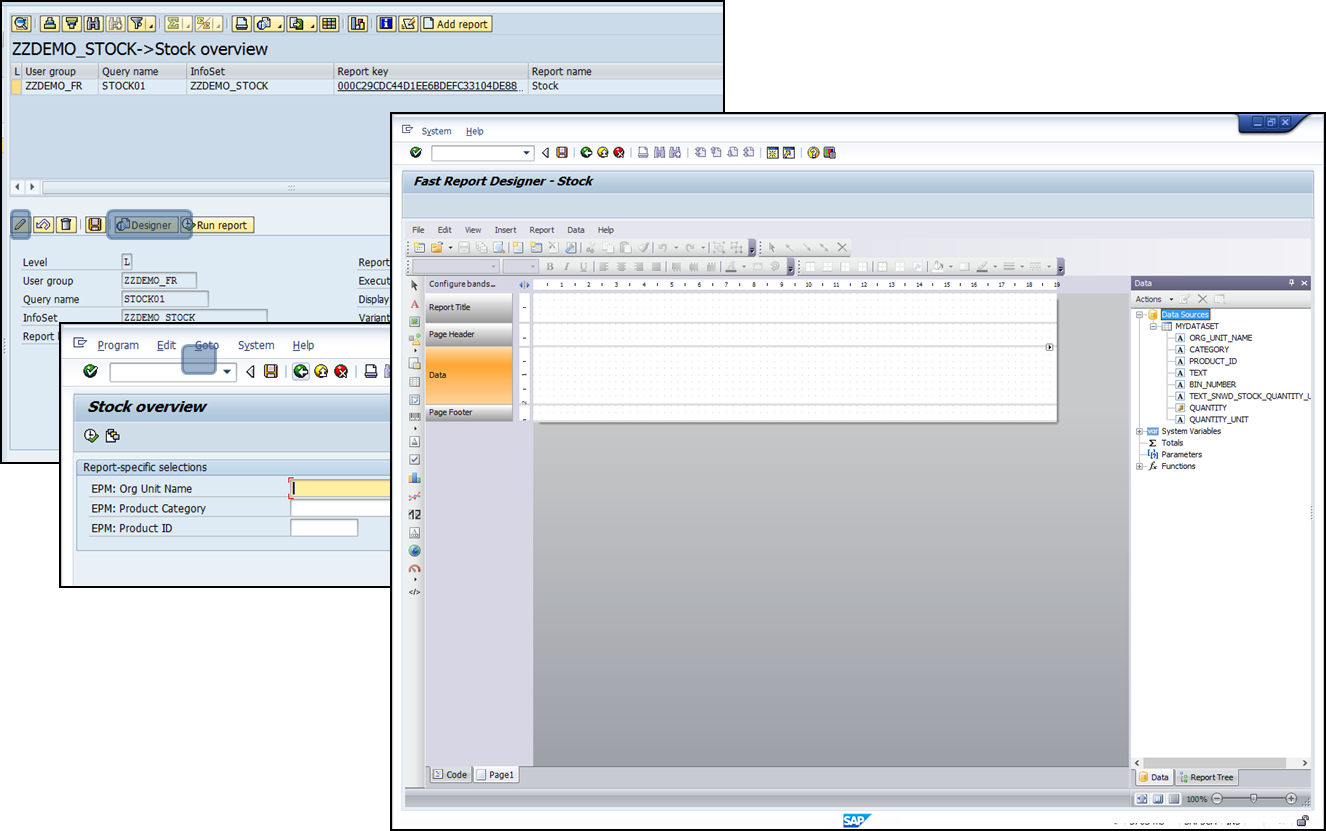
After report parameters have been saved – press edit button and then “Designer”. Selection screen with report parameters will appear. Execute report. As result - Fast report designer will be opened.
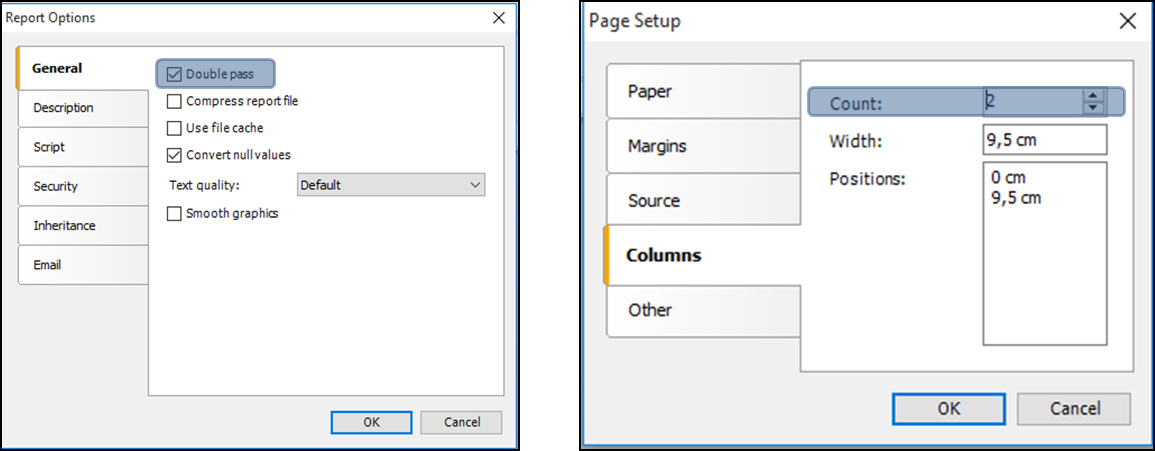
Adjust report options:
- Menu: Report->Options->General->Double pass.
- Menu: File->Page setup->Columns->Count->2.
Let’s configure bands
- Menu: Report->Configure bands.
- Configure (add\remove) bands as presented on the screenshot
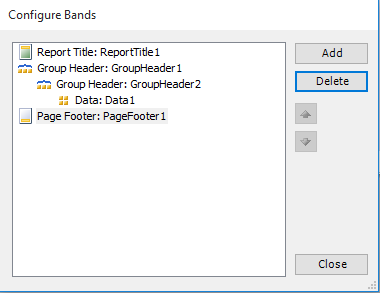
Press on “Close” button.
- Double click on 1st level group header band and put “[MYDATASET.CATEGORY]” as group condition.
- Double click on 2d level group header band and put “[MYDATASET.PRODUCT_ID]” as group condition.
- Double press on Data band and choose “MYDATASET” as data source
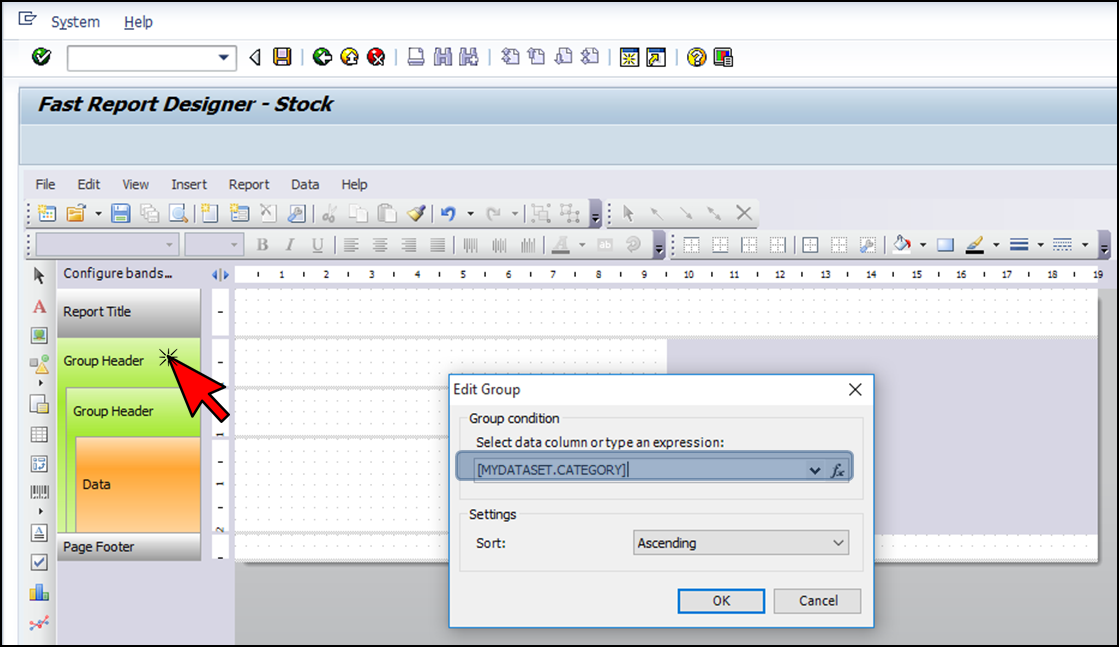 .
.
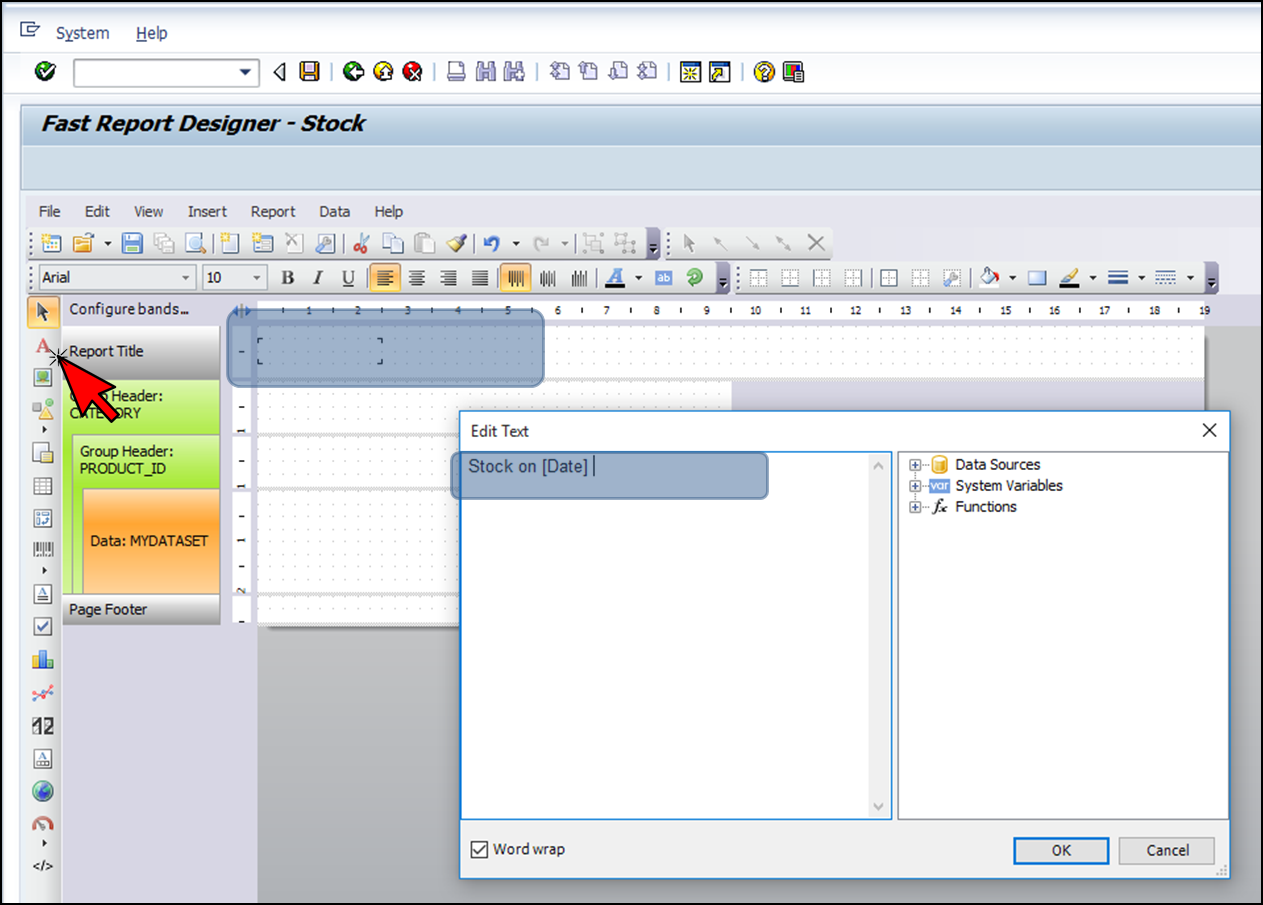
Place report elements
- Choose “text element” from element toolbar and place it on Report title band. Double click on it and put follow text in it “Stock on [Date]”.
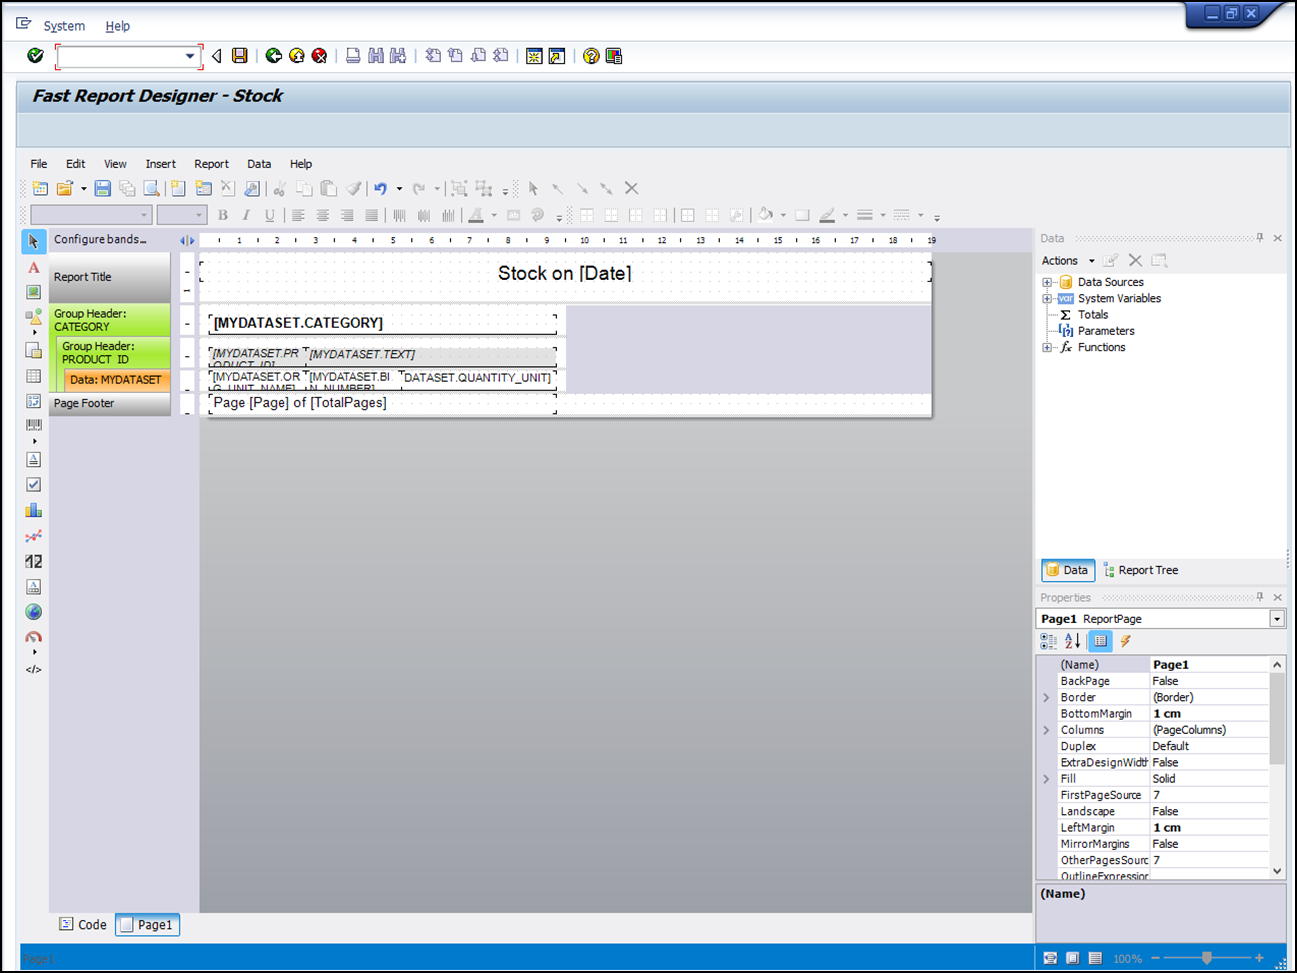
- From “Data” view drag “Category” to the first level group header band. From “Data” view drag “Product_id”, “TEXT” to the second level group band.
- From “Data” view drag “ORG_UNIT_NAME”, “BIN_NUMBER”, “QUANTITY” to the “DATA” band. Double press on “QUANTITY” element and add “[MYDATASET.QUANTITY_UNIT]” to it.
- On the report footer place “text element” from element toolbar put follow text in it “Page [Page] of [TotalPages]”.
Final template should look so:
Press preview button and view results (in designer mode source data restricted up to 100 rows).
Save report (press SAP standard button) and leave designer.
Now press “Run report” to run report and see results.
Sometimes preview may be opened in backgroud, use Alt+Tab to switch between windows.
RUN
To use this report as standalone (without ZFR_COCKPIT) we need to create separate transaction for it.
Run transaction SE93, enter any transaction code you want (for example ZZDEMO_STOCK), put short text and choose “Transaction with parameters” as start object.
On the next screen put “ZFR_RUN” as transaction code, check “skip initial screen” and in “Default values” add field “p_rep” and value <your report ID>.
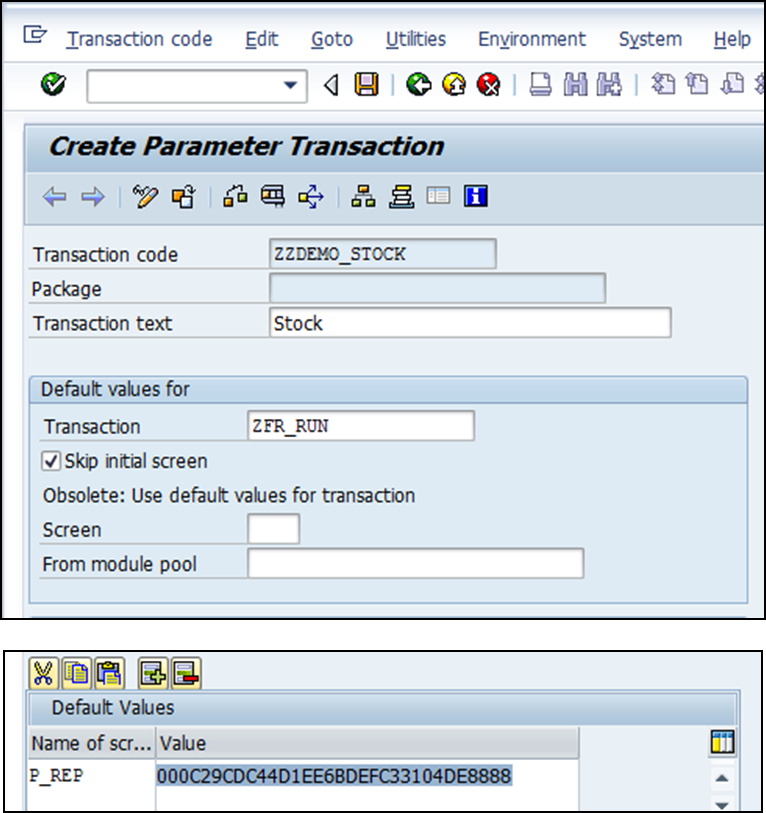
Save data.
Now you can run report directly by calling transaction ZZDEMO_STOCK.