How to use Online Designer in a knockout.js application
The knockout.js library was quite popular among web developers before the appearance of angular. Despite the obvious advantages of angular, knockout is still in demand. Many web applications are written on it. Some of them need reporting. Therefore, we will discuss in this article how to integrate the FastReport online report designer into the application, with the client part on the knockout, and the server part on the ASP.Net Core.
First of all, we need the Knockout application template for the dotnet platform. You must have the NET Core 2.0 SDK or MS Visual Studio 2017 installed. Open the Windows command prompt. Go to the directory where you plan to create the application. Enter the command:
dotnet new — install Microsoft.AspNetCore.SpaTemplates::*
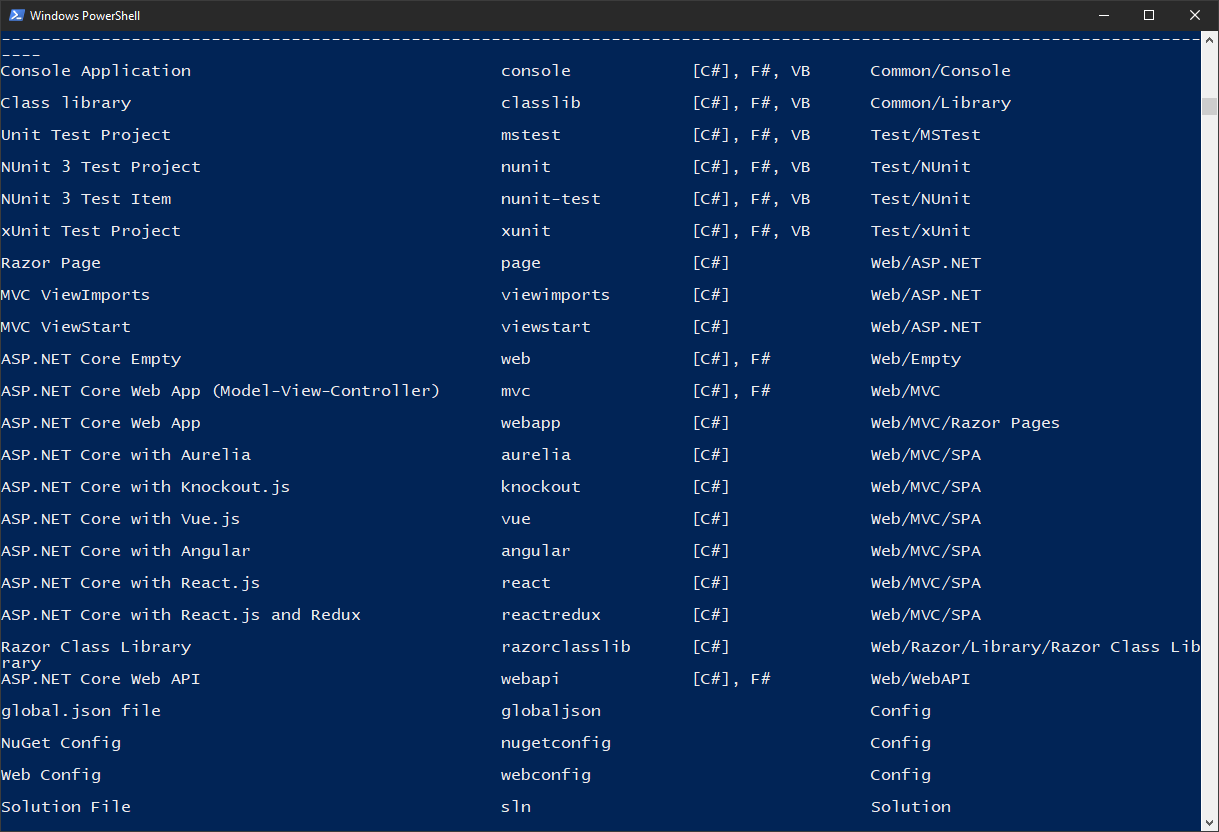
As a result, we should see a list of available one-page application templates:

In this list we see knockout - it means you can create an application from a template. Enter the command:
dotnet new knockout –o KnockOnlineDesigner
This command creates a demo application with the prepared structure. After creating the application, you need to install the necessary packages. Therefore, go to the folder with the created application:
cd KnockOnlineDesigner
And install the packages:
npm install
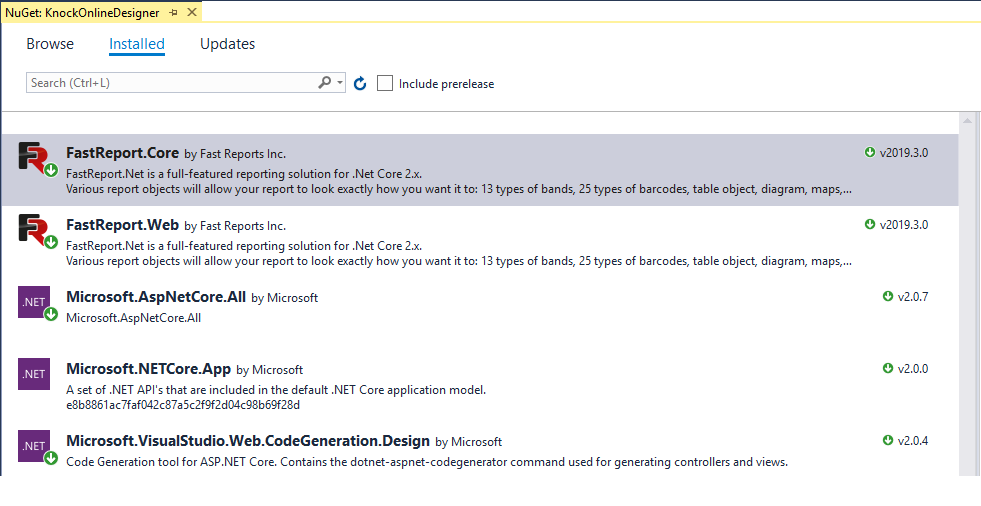
Open the created project. Now you can run the application and see three demo pages. But our task is to create our own page with an online designer. First of all, you need to install the FastReport.Net packages in the Nuget package manager. Open the manager and configure the local package source - the Nuget folder in the FastReport.Net installation directory.

The FastReport.Core and FastReport.Web packages are installed, now you need to enable the use of FastReport in the application. Editing the Startup.cs file. Add a line to the Configure method:
app.UseFastReport();
Add the App_Data folder to the wwwroot folder. Put in it the xml database for reports:

Then we move to editing SampleDataController controller. We remove all the methods from it and add our own:
1 2 3 4 5 6 7 8 9 10 11 12 13 14 15 16 17 18 19 20 21 22 23 24 25 26 27 28 29 30 31 32 33 34 35 36 37 38 39 40 41 42 43 44 45 46 47 48 49 50 51 52 53 54 55 56 57 58 59 60 61 62 63 64 65 66 67 68 69 70 71 72 73 |
[Route("api/[controller]")] public class SampleDataController : Controller { private IHostingEnvironment _env; public SampleDataController(IHostingEnvironment env) { _env = env; } // public string ReportPath; [HttpGet("[action]")] public IActionResult Design(string ReportName) { var webRoot = _env.WebRootPath; WebReport WebReport = new WebReport(); WebReport.Width = "1000"; WebReport.Height = "1000"; Task.WaitAll(); var path = System.IO.Path.Combine(webRoot, "App_Data/", ReportName); if (System.IO.File.Exists(path)) { WebReport.Report.Load(System.IO.Path.Combine(webRoot, "App_Data/", ReportName)); // Load the report into the WebReport object } System.Data.DataSet dataSet = new System.Data.DataSet(); // Create a data source dataSet.ReadXml(System.IO.Path.Combine(webRoot, "App_Data/nwind.xml")); // Open the xml database WebReport.Report.RegisterData(dataSet, "NorthWind"); // Registering the data source in the report WebReport.Mode = WebReportMode.Designer; // Set the mode of the object web report - display designer WebReport.DesignerLocale = "en"; WebReport.DesignerPath = @"WebReportDesigner/index.html"; // We set the URL of the online designer WebReport.DesignerSaveCallBack = @"api/SampleData/SaveDesignedReport"; // Set the view URL for the report save method WebReport.Debug = true; ViewBag.WebReport = WebReport; // pass the report to View return View(); } [HttpPost("[action]")] // call-back for save the designed report public IActionResult SaveDesignedReport(string reportID, string reportUUID) { var webRoot = _env.WebRootPath; ViewBag.Message = String.Format("Confirmed {0} {1}", reportID, reportUUID); // We set the message for representation Stream reportForSave = Request.Body; // Write the result of the Post request to the stream. string pathToSave = System.IO.Path.Combine(webRoot, @"App_Data/TestReport.frx"); // get the path to save the file using (FileStream file = new FileStream(pathToSave, FileMode.Create)) // Create a file stream { reportForSave.CopyTo(file); // Save the result of the query to a file } return View(); } [HttpPost("[action]")] public async Task<IActionResult> Upload(List<IFormFile> files) { long size = files.Sum(f => f.Length); var webRoot = _env.WebRootPath; var filePath = System.IO.Path.Combine(webRoot, (String.Format("App_Data/{0}", files[0].FileName))); // full path to file in temp location if (files[0].Length > 0) { using (var stream = new FileStream(filePath, FileMode.Create)) { await files[0].CopyToAsync(stream); stream.Close(); } } return RedirectToAction("Design", "SampleData", new { ReportName = Path.GetFileName(filePath)}); } } |
The Design method creates a web report object and loads a report template into it. Then, this web report is switched to the development mode, and in fact is transmitted to the online designer.
The SaveDesidnedReport method is needed to save the edited report on the server.
The Upload method is used to upload a report file to the server.
For Design and SaveDesignedReport methods, you need to create views. Right-click on the method signature and select Add view. To view Design.cshtml, change the code to:
@await ViewBag.WebReport.Render()
And for SaveDesignedReport.cshtml change it to:
@ViewBag.Message
The ClientApp folder contains the application on knockout.js. Let's display our report designer right on the home page. Expand the ClientApp-> components-> home-page folder. Edit the home-page.html file:
Here we will display the open file dialog button. We transfer the uploaded file to the Upload function. Below, we display an online designer, obtained from the server.
Now change the script file home-page.ts:
1 2 3 4 5 6 7 8 9 10 11 12 13 14 15 16 17 18 19 20 21 22 23 |
import * as ko from 'knockout'; class HomePageViewModel { public designer = ko.observable(''); upload(file: Blob) { var files = new FormData(); files.append("files", file) console.log(files); if (file != null) { fetch('api/SampleData/Upload', { method: 'POST', body: files }) .then(response => response.text()) .then(data => { this.designer(data); }); } } } export default { viewModel: HomePageViewModel, template: require('./home-page.html') }; |
The Upload method receives the file and sends it to the server. In turn, the controller on the server uploads the report file to the online designer and returns it to the client. In the Upload method, we write the server's response to the designer variable.
It remains to correct the site menu nav-menu.html. Remove unnecessary pages from it:
1 2 3 4 5 6 7 8 9 10 11 12 13 14 15 16 17 18 19 20 |
<div class='main-nav'> <div class='navbar navbar-inverse'> <div class='navbar-header'> <button type='button' class='navbar-toggle' data-toggle='collapse' data-target='.navbar-collapse'> <span class='sr-only'>Toggle navigation</span> </button> <a class='navbar-brand' href='/'>KnockOnlineDesigner</a> </div> <div class='clearfix'></div> <div class='navbar-collapse collapse'> <ul class='nav navbar-nav'> <li> <a data-bind='attr: { href: router.link("/") }, css: { active: route().page === "home-page" }'> <span class='glyphicon glyphicon-home'></span> Home </a> </li> </ul> </div> </div> </div> |
And also edit the app-root.ts file and exclude unnecessary components from it:
1 2 3 4 5 6 7 8 9 10 11 12 13 14 15 16 17 18 19 |
class AppRootViewModel { public route: KnockoutObservable<Route>; public router: Router; constructor(params: { history: History.History, basename: string }) { this.router = new Router(params.history, routes, params.basename); this.route = this.router.currentRoute; ko.components.register('nav-menu', navMenu); ko.components.register('home-page', require('bundle-loader?lazy!../home-page/home-page')); } public dispose() { this.router.dispose(); Object.getOwnPropertyNames((<any>ko).components._allRegisteredComponents).forEach(componentName => { ko.components.unregister(componentName); }); } } export default { viewModel: AppRootViewModel, template: require('./app-root.html') }; |
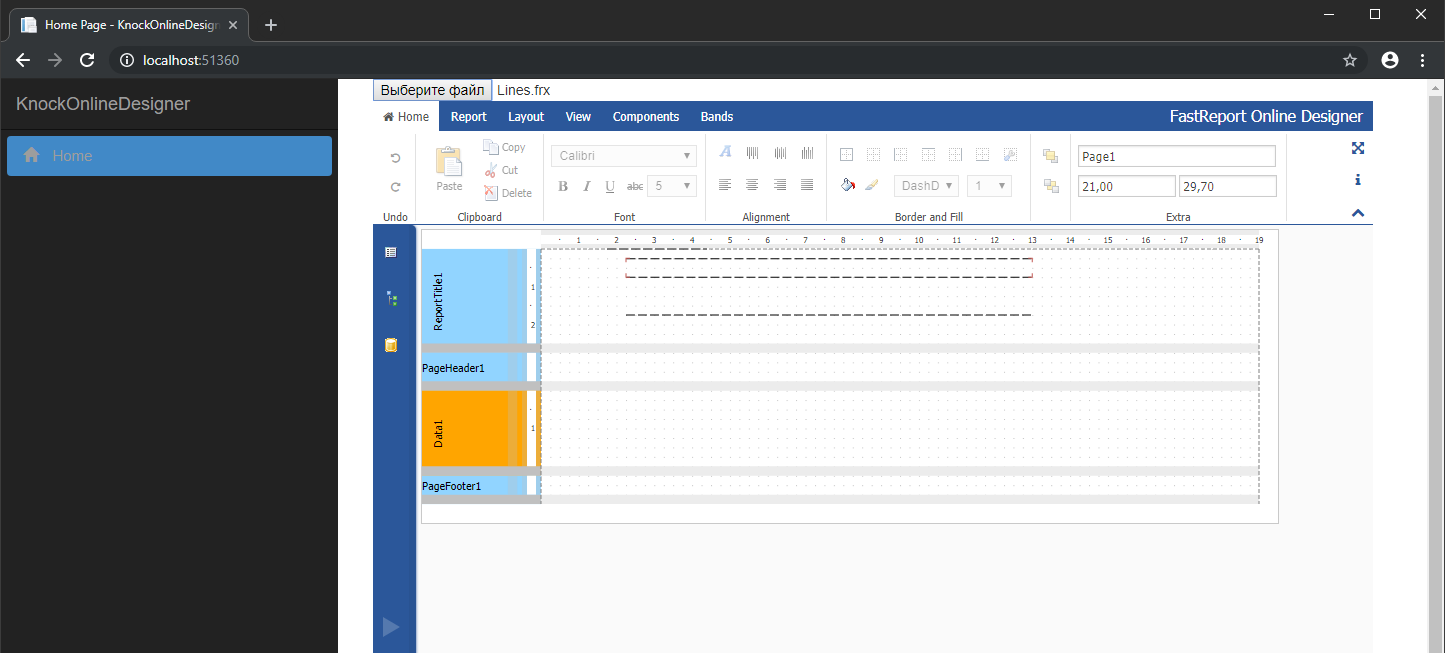
Run our demo app. Select the report file in frx format. The file will be uploaded to the server and transferred to the report designer:

This way you can edit report templates from your knockout application.