How to register data sources in web reports FastReport .NET
To use a data source in web - reports you need to register it. This can be done in two ways that will be illustrated in this work.
Registering a data source using the popup - menu of “WebReport” component.
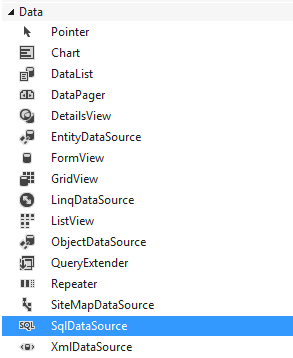
- Use the project ASP.Net. Add the component “SQLDataSource” to the form:
 2. Select “Configure Data Source” from the component's popup – menu:

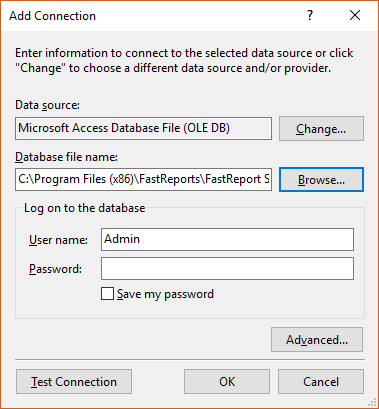
3. Create a connection. Select the type of the connection and database:
 4. Select the desired data table and fields;
5. Add “WebReport” component from toolbox to the form;
6. From the popup - menu of the component select "Choose Data Source”:
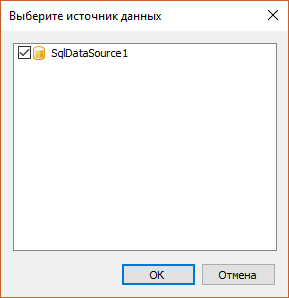
 7. Select the data source you previously added:

When everything is done, the data source can be used in the report.
Registering a data source using the function “RegisterDataSource”.
Copy and repeat the first 5 points of the previous example. Next, follow the instructions:
6. Select “WebReport” component on the form;
7. In the property “Inspector” switch to “Events” (Events);
8. Add the “StartReport” event;
9. Write the following code:
1 2 3 4 5 |
DataView view = (DataView)SqlDataSource1.Select(DataSourceSelectArguments.Empty); DataTable table = view.ToTable(); DataSet ds = new DataSet(); ds.Tables.Add(table); WebReport1.RegisterData(ds, "Connection"); |
So, the data logging function “RegisterData” was used in this work. “DataSet” and its name were used as arguments. Firstly, “SqlDataSource” was created to receive data from it in the form of “DataView”.
Then, the data was transformed into a table, which was added to “DataSet”.
Summing up, in this article two ways of registering data in a web report have been illustrated and examined. The conclusion drawn from the analysis indicates that the first way is the easiest and the most convenient. With this method it is possible to register and create a data source to run an application that allows generating reports with this data. However, the second method is also useful, when you have a desktop application and it is needed to publish reports on the web.