How to programmatically set the default email client settings for sending emails from FastReport.NET
Like many other report generators, FastReport .NET allows you to send a report via email in any of the available export formats. You can send an e-mail either in the report preview mode or in the custom application code.
To send an email you need to set the sender, recipient settings.
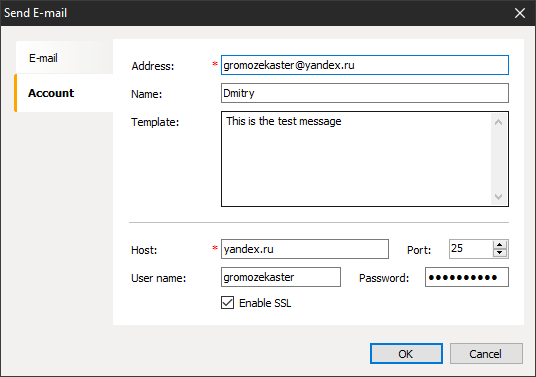
On the Account tab, you set the email client settings for sending emails and the sender's address and name.
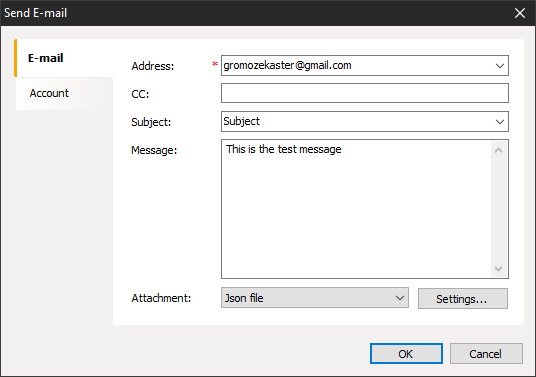
On the Email tab you set up the recipient's address, email subject, email text, and most importantly the report format to be attached to the email. When the email is sent, the report will be automatically exported in the specified format and attached to the email.
Any settings you set will be saved as the default settings when you send the email, and you can use them in the future. The same is true when you initialize the email settings values in the application code in the EnvironmentSettings component. The settings will only be saved once the email has been sent. But what if you want the default email settings to be applied immediately, without having to send an email to save them? This might be useful if you are using the report generator in a multi-user application and want to make mail presets so that users only have to enter the recipient address and click the send button.
The default email settings are located in the FastReport .NET report generator configuration file, which is usually located at the specified path
C:\Users\User\AppData\Local\FastReport\FastReport.config.
Open this file in a text editor and you will see an XML. Find the AccountSettings section and, if you have already sent mail from preview mode, you will see the default settings for sending mail. To edit this file in your custom application use the following code:
XmlItem xi = Config.Root.FindItem("EmailExport").FindItem("AccountSettings");
// save account info
xi.SetProp("Address", "a@a.com");
xi.SetProp("Name", "Name");
xi.SetProp("Template", "template");
xi.SetProp("Host", "host");
xi.SetProp("Port", "25");
xi.SetProp("UserName", "UserName");
xi.SetProp("Password", "Password");
xi.SetProp("EnableSSL", "1"); // "0" if SSL needs to be disabled
In this code, we read the configuration file and found the section for the mailing settings. And then - we set the settings. If this section or its properties are not in the configuration, they will be added automatically.
This way we can create pre-configured mail settings for our users.

