Library for generating reports and creating documents for .NET 10, Blazor, .NET Core, ASP.NET , MVC and WinForms. It can be used in Microsoft Visual Studio 2026 and JetBrains Rider environments.
Features and Benefits FastReport .NET
Report generator for WinForms, Blazor Server, ASP.NET , MVC, .NET 10
Using FastReport .NET, you can create reports that work independently of the application. In other words, FastReport .NET can be used as an independent solution for building reports. Judge for yourself:
- Contains a powerful visual designer for creating and modifying reports. Your application can run the report designer from the code;
- Contains an online report designer for ASP.NET;
- You can connect to any database, use any of its tables, or create your own queries in SQL;
- You can add one or more dialog forms to the report to request parameters before running the report;
- Using the built-in script, you can control the interaction between the controls of dialog forms and perform complex data processing;
- Finally, you can see the result in the preview window, print the report, or save it in a variety of popular formats.
ASP.NET demo |
ASP.NET MVC demo |
.NET Core demo |
Online Designer demo |
Blazor WASM Demo |
Blazor Server demo |

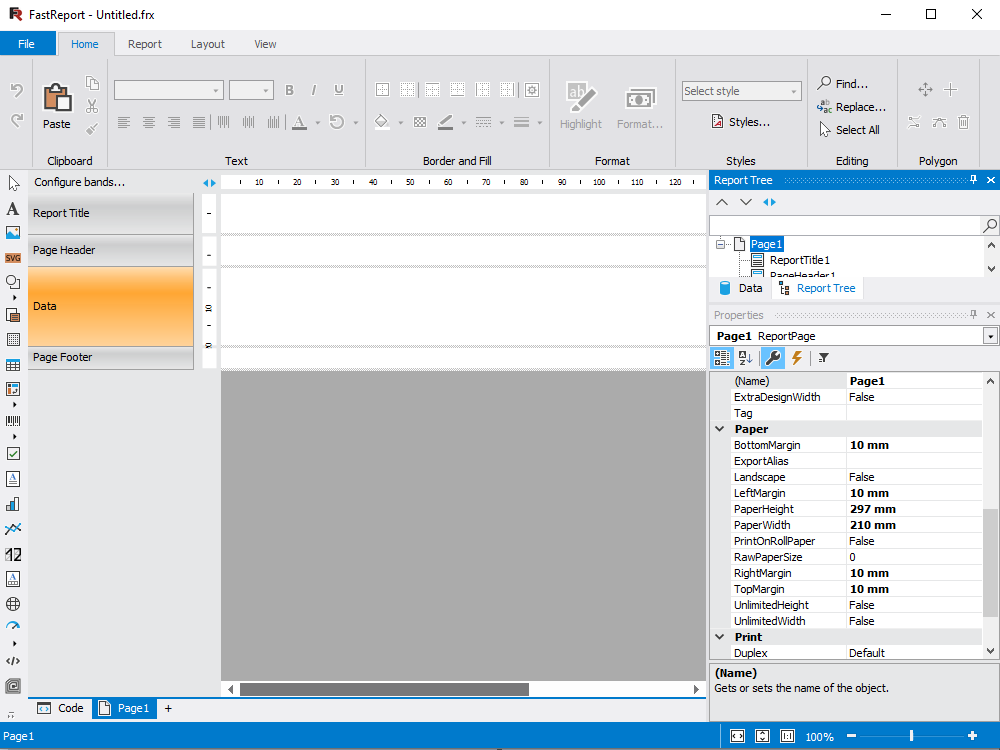
Template designer
The standalone desktop report designer is the heart of FastReport. It allows both developers and users to create, edit, view, save, export, and print custom reports without much hassle. The designer can be used at run-time. This will allow your users to independently edit existing documents and create new ones. The designer can also be used in MDI (Multi-Document Interface) mode to work with several reports simultaneously.
Localization is supported for more than 25 popular languages of the world.
FastReport .NET is a band-oriented report generator. A rich set of bands allows you to build reports of any type: list, master-detail, report with grouping, multi-column, master-detail-detail, and others. If you need to create many reports that contain the same elements (header, footer, company details, logos), then you can collect common elements into a base report and inherit all other reports from it. We also support subreports.

What is FastReport .NET?
- FastReport .NET is written in C# and contains only managed code. It is compatible with .NET 10, Blazor.
- FastReport .NET comes with source codes. You can adapt it to your own needs.
- Reasonable price and licensing policy. The license price includes a visual designer - you can give your users the opportunity to develop reports on their own. No additional deductions are required from your side! Please note the full terms of use in the License Agreement!
- FastReport report generator .NET allows you to add geographical maps to the report using the maps object, which will make the report relevant to the topic even more interactive.
- Integrated into FastReport .NET support for cloud services makes it possible to save reports to storage: Google Drive, OneDrive, DropBox, Box. It is possible to send documents by e-mail and FTP.
- Extensible FastReport architecture .NET allows you to create and connect your own objects, export filters, functions, wizards, and database engines to the report. If the available opportunities are not enough for you, expand them!
- Automated update of Nuget packages in Visual Studio.
- Support for RDL format - the ability to open and save in this format.
- Support for importing Crystal Reports.
- Very compact and really Fast!
How do I buy a product?
This product consists of a set of components in various supply options. You can buy a universal Ultimate solution to create your business projects on all modern platforms .NET, ASP.NET , Blazor, WASM, WPF, WinForms, Avalonia UI, Mono and others. Ultimate also includes components for data visualization, namely a business graph with a set of diagrams, and OLAP products for fast processing of large amounts of data. Or you can buy FastReport .NET as part of other packages.
Delivery options
| Features |
from $1,499
|
from $799
|
from $599
|
from $499
|
from $499
|
from $499
|
|---|---|---|---|---|---|---|
| FastReport Engine |
|
|
|
|
|
|
| WEB components |
|
|
|
|
|
|
| WinForms components |
|
|
|
|
|
|
| Avalonia components |
|
|
|
|
|
|
| WPF components |
|
|
|
|
|
|
| Mono components |
|
|
|
|
|
|
| Online Designer |
|
|
|
|
|
|
| FastReport.Drawing (Skia) |
|
|
|
|
|
|
| System.Drawing (GDI) |
|
|
|
|
|
|
| Report script engine |
|
|
|
|
|
|
| Data connections |
|
|
|
|
|
|
| Reporting features |
|
|
|
|
|
|
| Report objects |
|
|
|
|
|
|
| Barcodes |
|
|
|
|
|
|
| Charts |
|
|
|
|
|
|
| Printing |
|
|
|
|
|
|
| Export in formats |
|
|
|
|
|
|
| Transports |
|
|
|
|
|
|
| Convertors from |
|
|
|
|
|
|
| Plugins |
|
|
|
|
|
|
| Custom plugin support |
|
|
|
|
|
|
| Source Code |
|
|
|
|
|
|