How to use FastReport Core Web Report in Angular 7
The concept of one-page apps is finding an increasing number of supporters. One of the most famous one-page frameworks is Angular, which is a one-page JavaScript application framework. The first version of Angular was really based on JavaScript. But all subsequent versions are already working on TypeScript, and are quite different from the first one. There is no sense in creating new applications on AngularJS, so we will use the current version of Angular 7.
Microsoft managed to successfully combine Angular and ASP. NET Core MVC. Therefore, it is relatively easy for us to display reports in a one-page application using the implementation for ASP .NET Core MVC.
Node.js installation
To start development on the Angular framework, you need to pre-install a platform for executing JavaScript code on the server side. It's called Node.js. To install it, download the installer that matches your operating system from the developer’s website https://nodejs.org/en/. This is an absolutely free product.
You will also need to install .NET Core SDK 2.0 or fresher version. However, this is not necessary if you have Microsoft Visual Studio 2017 installed.
How to create an application?
There are two ways - to create a new project in Visual Studio or to run the command from the command line.
For the first option, you will have to install the Angular application template in the Visual Studio extensions.
And the second is much simpler. Create a folder for your application. In the Windows command line, go to the created folder using the cd command and execute the command:
dotnet new angular -o AngularFRCore
As you understand AngularFRCore is the name of your future project.
After creating the application, you need to install the typescript libraries. We will do this using the Node.js npm platform library installer.
I hope you have not yet closed the console, where we executed the command to create the application?
Run another command while in the application directory:
npm install -g typescript
Now, open the project. Yes, there is no solution file, it will be created when you first start the project.
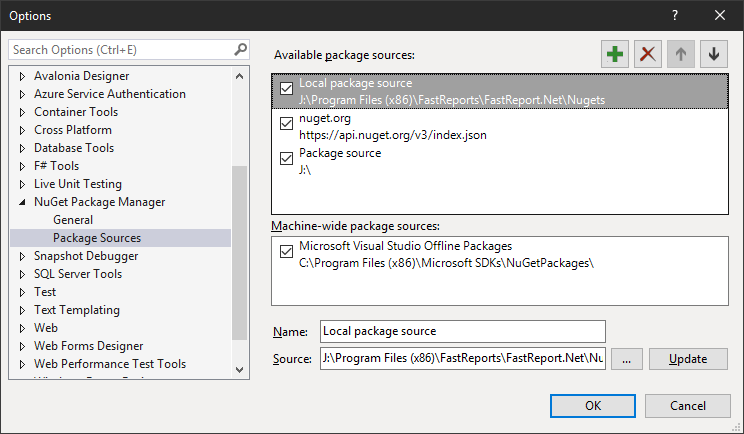
The goal of our demo application is to show how to use FastReport.Core in a one-page application. Let's add the FastReport library to our project. Open the NuGet package manager. In the upper right corner, you can select the source of the packets. We are interested in a local source, but first you need to configure it. To do this, click on the gear icon in the upper right corner. And we set the path to the local folder with packages:

By default, this folder is: C: \ Program Files (x86) \ FastReports \ FastReport.Net \ Nugets.
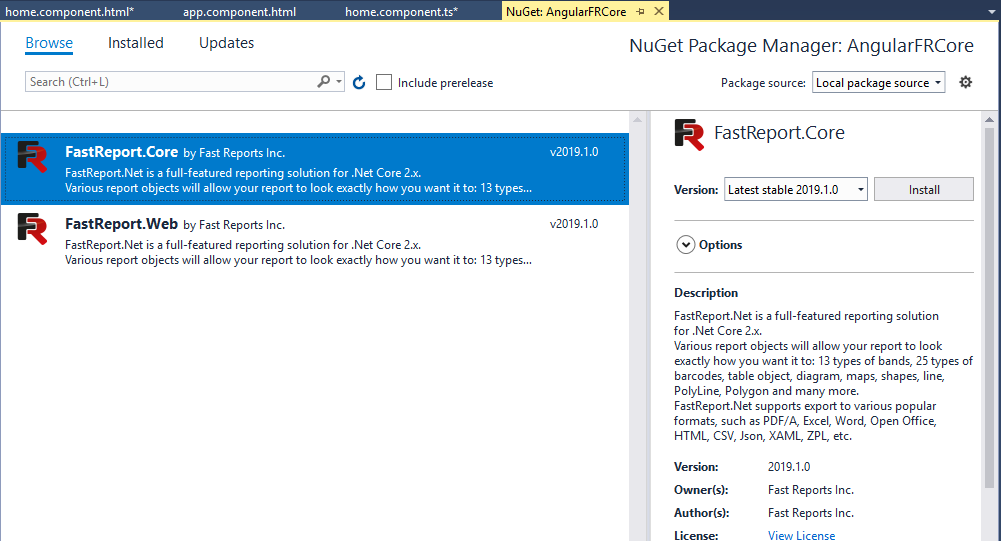
By installing FastReport .NET you get ready-made packages in the above pack. Let's return to the package manager:

We have two packages available. Install them.
To use FastReport in an application, you need to add one line of code to the Startup.cs file:
1 2 3 4 5 6 |
public void Configure(IApplicationBuilder app, IHostingEnvironment env) { … app.UseFastReport(); … } |
If you glance at the project tree, you can see the Controllers and Models catalogs that are familiar to us from MVC applications. Looking ahead, I will say yes, we can use the almost unchanged MVC .Net Core application as a backend.
There is already one in the Controllers folder - SampleDataController.
Feel free to clear the class contents - we will create our own method:
1 2 3 4 5 6 7 8 9 10 11 12 13 |
[HttpGet("[action]")] public IActionResult ShowReport(string name) { WebReport WebReport = new WebReport(); WebReport.Width = "1000"; WebReport.Height = "1000"; WebReport.Report.Load(String.Format("App_Data/{0}.frx", name)); // Load the report into the WebReport object System.Data.DataSet dataSet = new System.Data.DataSet(); // Create a data source dataSet.ReadXml("App_Data/nwind.xml"); // Open the xml database WebReport.Report.RegisterData(dataSet, "NorthWind"); // Registering the data source in the report ViewBag.WebReport = WebReport; // pass the report to View return View(); } |
If you are already familiar with FastReport.Core, then there is nothing new in this method. We created the web report object, loaded the report template into it, created and registered the data source and passed the report to the view. This method has a parameter - the name of the report that we use to load the desired report template.
FastReport.Net set includes a folder with demo reports:
C:\Program Files (x86)\FastReports\FastReport.Net\Demos\Reports
We will take several templates and a nwind.xml database from it. But first, create the App_Data folder in the project root. Now drag files into it from the above folder:
Barcode.frx, Master-Detail.frx, Matrix.frx, nwind.xml.
The next step is to create a view for this method.
There is no Views folder in our project. Create it in the project root. Inside this folder, add another one named SampleData. And, finally, inside this folder we create a new view - ShowReport.chtml with the following content:
1 |
@await ViewBag.WebReport.Render()
|
In asynchronous mode, we are waiting for the generation of the HTML version of the report.
So, we have prepared a backend, which came with Angular. Let's look at the ClientApp folder. This is a one-page application. We are interested in the src -> app directory. Here are the main files responsible for displaying content - page templates and their type script handlers. The homepage template is app.component.html. We will edit it exactly:
1 2 3 4 5 6 7 8 9 10 11 12 13 14 15 16 17 18 19 20 21 22 23 24 25 |
<tr> <td width="150px"> </td> <td> <h1>FastReport.Core Demo</h1> <p>Select a report and click the button</p> <div> <div> <input type="radio" id="reportChoice1" name="report" value="Matrix" (click)="this.report = 'Matrix'"> <label for="reportChoice1">Matrix</label> <input type="radio" id="reportChoice2" name="report" value="Matrix" (click)="this.report = 'Master-Detail'"> <label for="reportChoice2">Master-Detail</label> <input type="radio" id="reportChoice2" name="report" value="Matrix" (click)="this.report = 'Barcode'"> <label for="reportChoice2">Barcode</label> </div> <input type="button" (click)="Clicked()" value="Show Report" /> <div *ngIf="show"> <iframe id="report" height="1000" width="1000" [src]="url | safeUrl"></iframe> </div> </div> </td> </tr> |
First we display three radio buttons for different reports. Each button is subscribed to the Click event by which we set the value of the report variable. The function takes the name of the report as the parameter. In this way we organize the selection of the desired report template. A fairly primitive implementation, but for the purposes of demonstrating a report, it is no longer necessary.
Below, we show a button called ShowReport, which is also subscribed to the click event with the Clicked () handler. Pay attention on the div with the condition * ngIf = ”show”. If the show variable is true, then the code in the internal tags will be executed. In our case, the frame will be displayed. This is done in order not to display an empty frame when the page is initially loaded. Further, when we select the report and click the Show Report button, the frame with the report will be displayed.
In the frame attributes we set the source from the variable url. Interestingly, we “normalize” this variable with the help of the safeUrl function, applying it through the pipe. This function will check the url for security and valid characters and bring it to the correct form. We will look at it in more details later.
And now, look at the app.component.ts component script, which is responsible for processing the template discussed above:
1 2 3 4 5 6 7 8 9 10 11 12 13 14 15 16 17 18 19 20 |
import { Component } from '@angular/core'; @Component({ selector: 'app-root', templateUrl: './app.component.html', styleUrls: ['./app.component.css'] }) export class AppComponent { title = 'app'; show: boolean = false; url: string; report: string; Clicked() { if (this.report != null) { this.show = true; this.url = "api/SampleData/ShowReport?name=" + this.report; } } } |
Here are the show and url variables that we saw in the page template. As well as the variable report, which contains the name of the selected report. The Clicked () function sets the show variable to true and sets the path to the report in the url variable.
And now we will create the safeUrl function, which we used in the pipe with the variable url. In the app directory file safeUrl.pipe.ts:
1 2 3 4 5 6 7 8 9 10 |
import { Pipe, PipeTransform } from '@angular/core'; import { DomSanitizer } from '@angular/platform-browser'; @Pipe({ name: 'safeUrl' }) export class SafeUrlPipe implements PipeTransform { constructor(private sanitizer: DomSanitizer) { } transform(url) { return this.sanitizer.bypassSecurityTrustResourceUrl(url); } } |
To use this function in the page template, add the declaration of this pipe module in app.module.ts:
1 2 3 4 5 6 7 8 9 10 11 12 13 14 15 16 17 18 19 20 21 22 |
import { BrowserModule } from '@angular/platform-browser'; import { NgModule } from '@angular/core'; import { FormsModule } from '@angular/forms'; import { HttpClientModule } from '@angular/common/http'; import { RouterModule } from '@angular/router'; import { SafeUrlPipe } from "./safeUrl.pipe"; import { AppComponent } from './app.component'; @NgModule({ declarations: [ AppComponent, SafeUrlPipe ], imports: [ BrowserModule.withServerTransition({ appId: 'ng-cli-universal' }), HttpClientModule, FormsModule ], providers: [], bootstrap: [AppComponent] }) export class AppModule { } |
This completes the work on the demo application. Run the application:

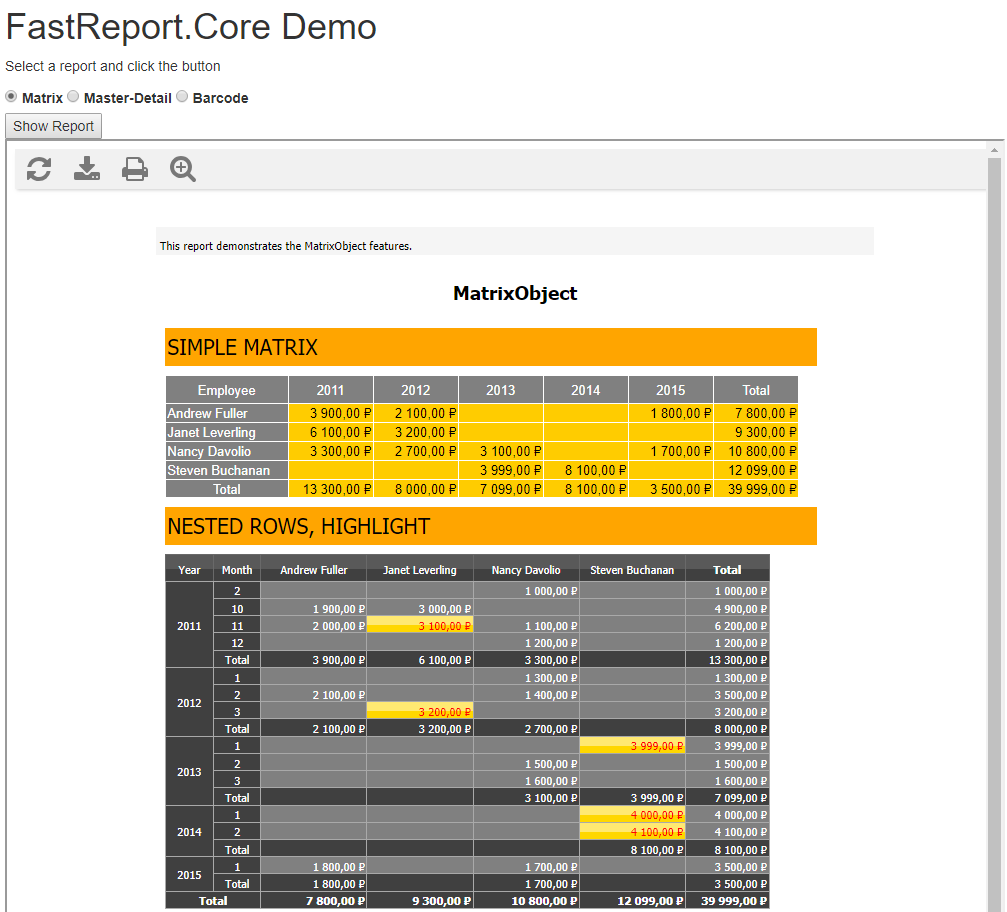
First you need to select one of the reports and click the button:

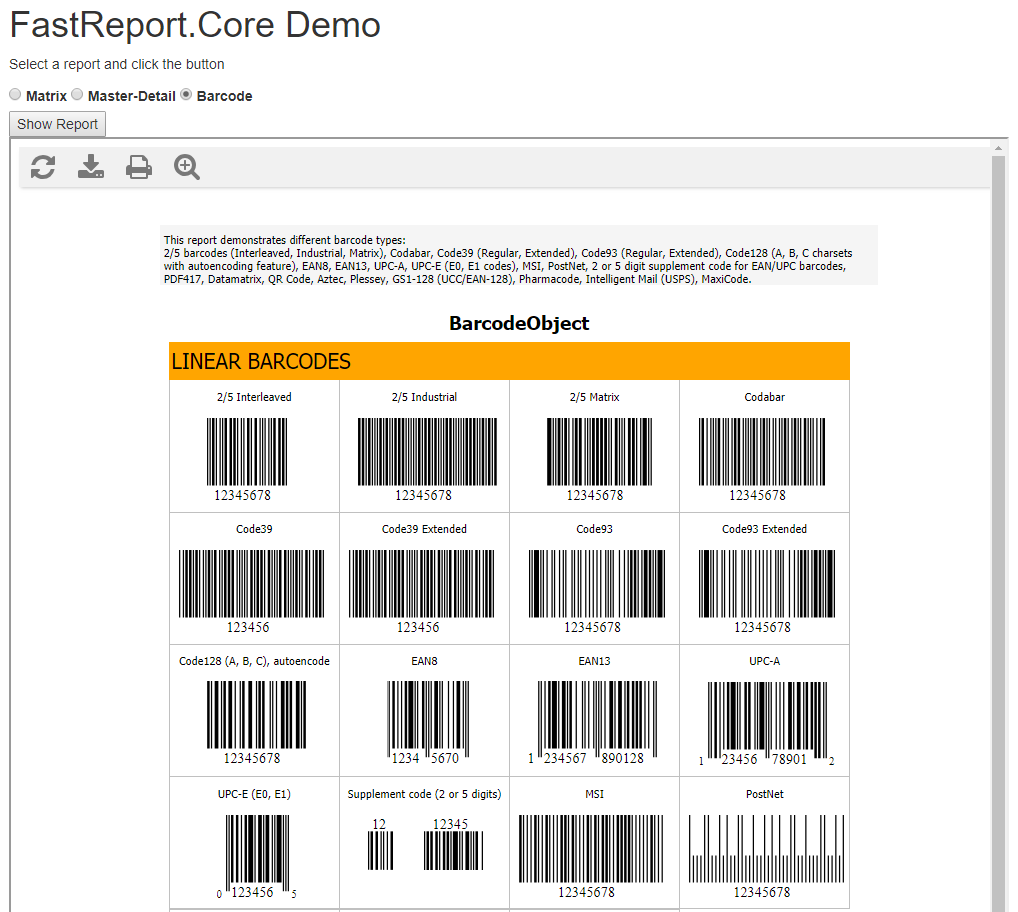
Now select another report and click the button:

Thus, you have seen that using the FastReport.Core report generator in the Angular one-page application is not much more difficult than in the usual ASP .NET Core application.