How to use the FastReport Cloud file manager
The latest update FastReport .NET adds the ability to interact with your reports located on the FastReport Cloud server.
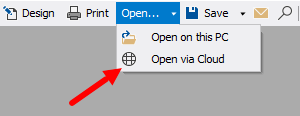
Now you can open the file manager in two ways.
- Through a preview of the prepared report in .fpx format).
- Using the raw report designer in .frx format).
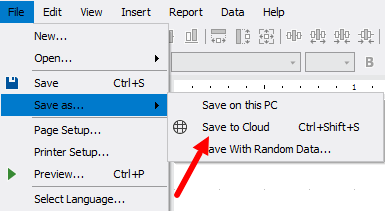
You can also save the report to your FastReport Cloud server if you work in the designer.
Connecting to a server
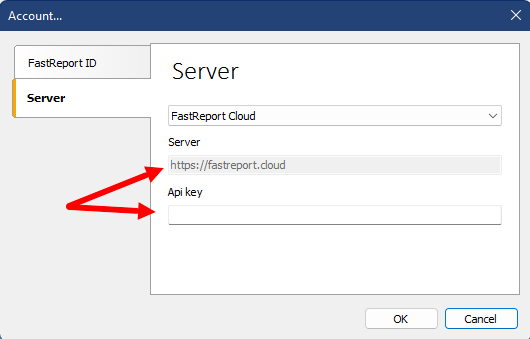
When you open the file manager, if the user is not authorized, an authorization window will open to log in to your FastReport ID account. (You can open the window yourself by going to the following path Help - Account).
If you need to connect to a server different than fastreport.cloud, you will need to enter the server address and the corresponding api key. Moreover, the api key can also be used when connecting to fastreport.cloud as an alternative to the standard account login.
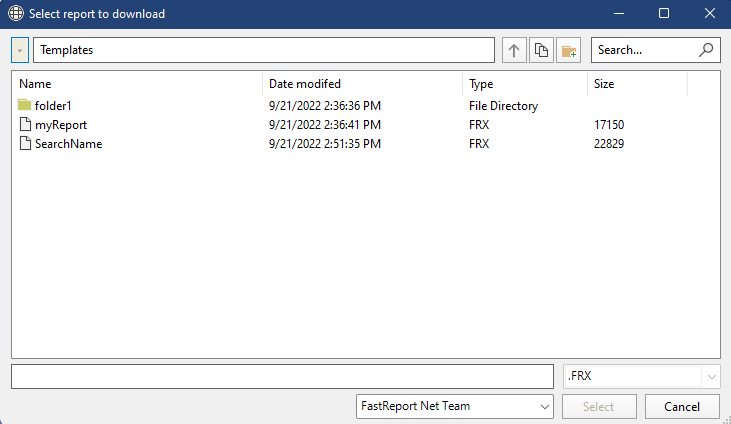
The file manager will open if the connection to the server was successfully established.
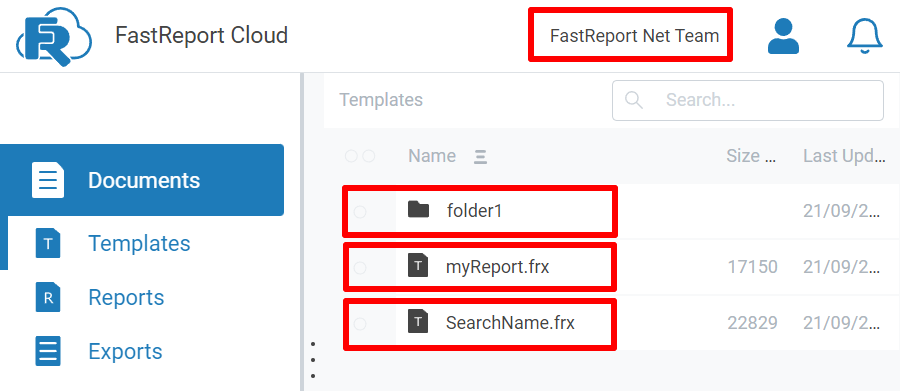
For comparison, let's open FastReport Cloud in the browser.
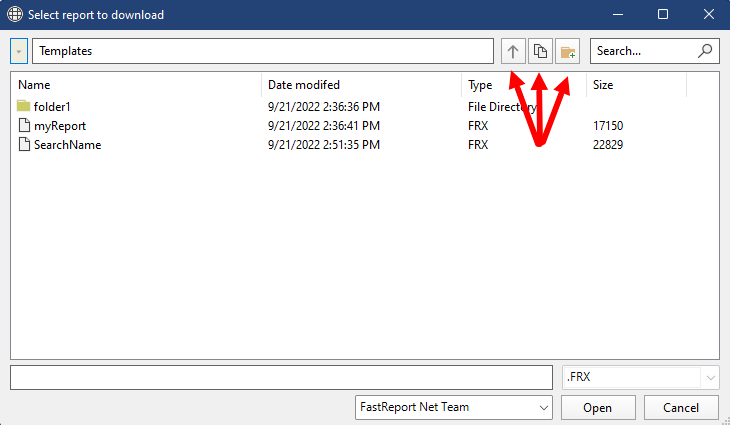
As you can see, the file manager displays the same files as in the web version of Cloud.
File manager functions
The file manager supports:
- Selecting and downloading a report to the designer;
- Search for necessary reports by their name;
- Using context menu with folders and reports;
- File sorting by: name, creation time, type, and size;
- Button use: go back to the directory, copy the path, and add the folder at the top of the window;
- Ability to navigate through the directory by clicking on the folder name in the address bar;
- Switching between workspaces;
You can also manually write the name of the desired file in the bottom panel to open it. However, you will see a warning if this file does not exist in the current directory.
If you need to rename the saved report, then change its current name in the bottom panel. In this case, the file extension .frx or fpx is optional.
It is important to note that several people can work with reports from the Cloud. If the downloaded report has already been modified on the server, for example, another person finished working with it before you, then you will see the corresponding window. You can either overwrite the report on the server or cancel your changes.
Are there any restrictions on working with the reports opened in the Cloud?
No. A report opened from the cloud supports the full functionality of the designer. Moreover, Ctrl+S (Save) will update the report in your workspace.
Web Preview
When viewing a report from the Cloud, the user could see inconsistencies in the file prepared in the desktop application. That’s why we have added a new web preview feature.
The web preview button will be active if the report is opened from Cloud. When clicked, it will open a page with a prepared report in a standard browser.
Working with data sources
Data connections are stored in Cloud. Now it is possible to use these connections in your report in the desktop application. To add a data source located in Cloud, go to Data→ New data source…→ Select connection from server.
A window with all available connections will be shown after clicking on the button. It will also specify the connection name, connection type, and connection status.
After selecting a connection, you can view the connection string, enter the desired name, and select the tables that you want to use.
Loading and updating a data source
The context menu of data sources now has a new item "Update connection on Cloud" (for Cloud connections) and "Upload Data Source to server" (for local connections).
You will be able to update the connection if you have changed, for example, the name of the connection and/or the connection string. And of course, upload the data source to Cloud. The respective window will be shown in case of a successful or unsuccessful task.
It is important to note that you will not be able to upload to Cloud only XML and CSV, which are connected locally, and not through a string.
Welcome window and list of recently opened items
The welcome window now offers the option to open a report from Cloud that you have recently worked on. Just click on it in the list. However, you will receive a notification if you try to open the report while being authorized with a subscription that does not contain this file or if you will be unauthorized.
To avoid this, you can go to your account directly from the welcome window.
This way, you have an ultimate tool that will streamline cloud reporting. Now you don’t have to do manipulations and manually download the report from the server, then open it in the designer, and set up connections. It will also help to avoid problems during the report preview.

