Interactive web report – detail page
Interactive reports allow the user to interact with the report through hyperlinks. Through hyperlinks, you can run other reports, or to move to other pages of the report or go to your bookmarks.
In the article "Interactive Web reports in MVC project," we looked at how to create an interactive report with a detail report. In essence, we have created two reports. One refers to another one.
But everything can be done easier. You do not have to create a separate report for detail. You can make a detailed report on a separate page in the main report. Let's look at how to do it.
Create a report. As a data source I have used xml database of FastReport.Net delivery. Table Categories and Products.
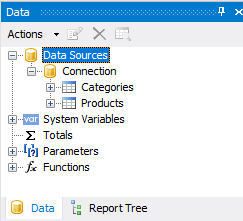
Create the relation between the tables:
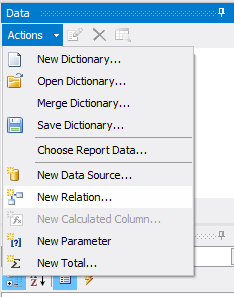
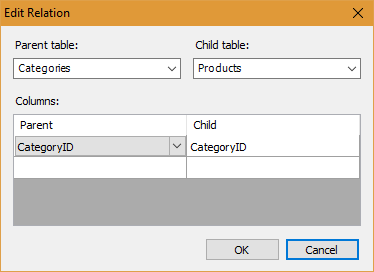
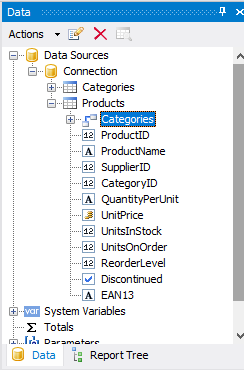
You can see the new relation in the data window:
Let’s place fields on the data band:

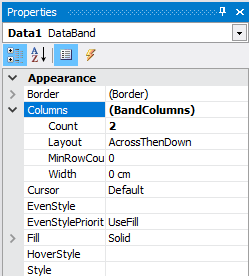
As you can see, we have placed two fields: Category Name and Picture. Property Columns-> Count is set to 2 in the data band.
Add a new page of the report. We will create a detailed report in it - a list of products. The report template is quite simple:

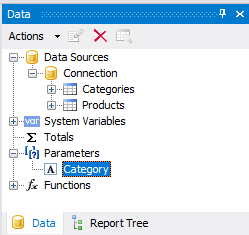
Now you need to organize a filtering of a list products. We will be filter by category name. We will pass the category name from the first page to the second. To do this, create a report parameter on the second page:
Now, open the band "Data" editor by double-clicking on it. Tab "Filter":
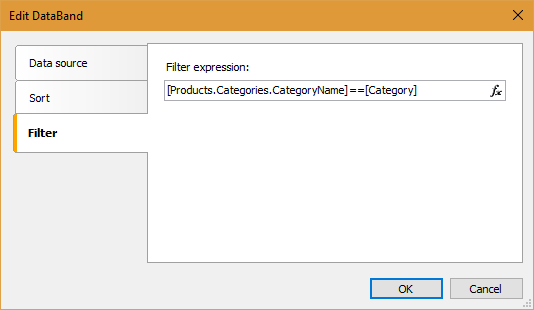
We used the CategoryName field from the Categories table connected to the filter expression.
Go to the first page of the report. Click on Categories.CategoryName field on the band "data." In the Property inspector find Hyperlink. And open the hyperlink editor:
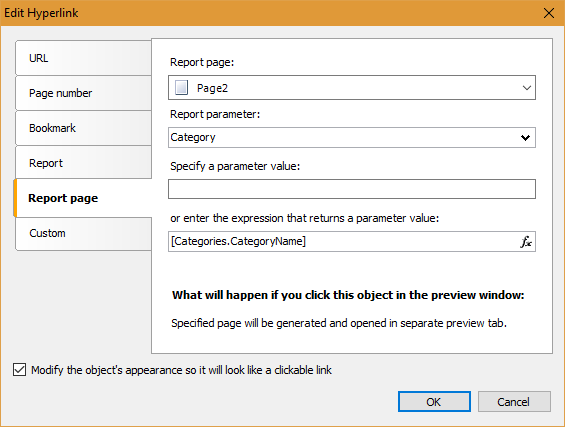
Select the tab "details page of the report." Here we choose: the second page of the report parameter Category. The value of the parameter is given by: [Categories.CategoryName]
At the bottom of the form enables the option "Modify the object’s appearance so it will look like a clickable link."
The report is ready. Save it and go to the second stage.
The second stage of work I have identified the creation of a demo web application. Create an MVC project. Add a link to the library and FastReport.dll FastReport.Web.dll.
The report will be placed on the home page of the site - Home. Therefore, the logic the report is placed in the controller HomeController.
Add the libraries:
1 2 |
using FastReport.Web; using System.Web.UI.WebControls; |
And following code:
1 2 3 4 5 6 7 8 9 10 11 |
public ActionResult Index() { WebReport webReport = new WebReport(); //create the inctance of WebReport object. string report_path = "J:\\Program Files (x86)\\FastReports\\FastReport.Net\\Demos\\Reports\\"; //Reports location System.Data.DataSet dataSet = new System.Data.DataSet(); //Create DataSet dataSet.ReadXml(report_path + "nwind.xml"); //Load xml db into dataset webReport.Report.RegisterData(dataSet, "NorthWind"); //register the dataset in report webReport.Report.Load(report_path + "Simple Interactive.frx"); //load a report into WebReport ViewBag.WebReport = webReport; //pass the report to View return View(); } |
Now we need to show our report in view Index.cshtml (Views-> Home folder).
Web page code looks like this:
1 2 3 4 |
@{ ViewBag.Title = "Home Page"; } @ViewBag.WebReport.GetHtml() |
In the last line, the controller transmits a report submitted to display.
It is necessary to connect scripts in _Layout.cshtml file:
1 2 3 4 |
<head> @WebReportGlobals.Scripts() @WebReportGlobals.Styles() </head> |
Add the namespace in web.config file, which is located in the Views folder.
1 2 3 4 |
<namespaces> <add namespace="FastReport" /> <add namespace="FastReport.Web" /> </namespaces> |
Add a handler in the Web.config file located in the root of the project:
1 2 3 4 5 |
<system.webServer> <handlers> <add name="FastReportHandler" path="FastReport.Export.axd" verb="*" type="FastReport.Web.Handlers.WebExport"/> </handlers> </system.webServer> |
We launch our application. And see our report:
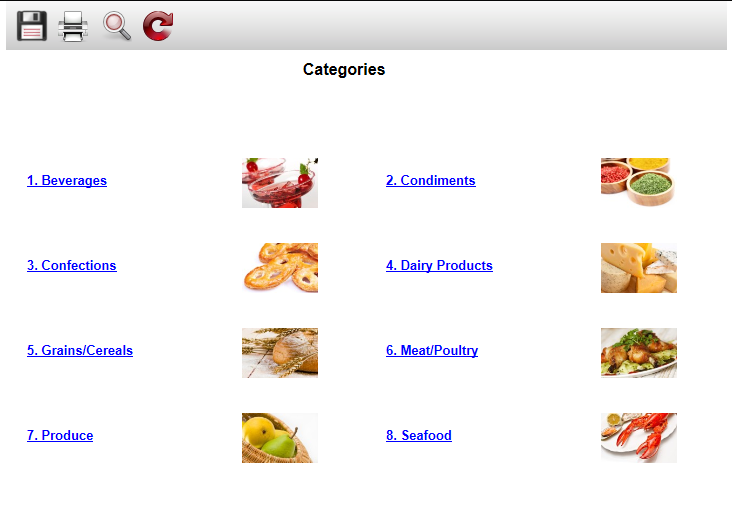
Click on the category Confections.
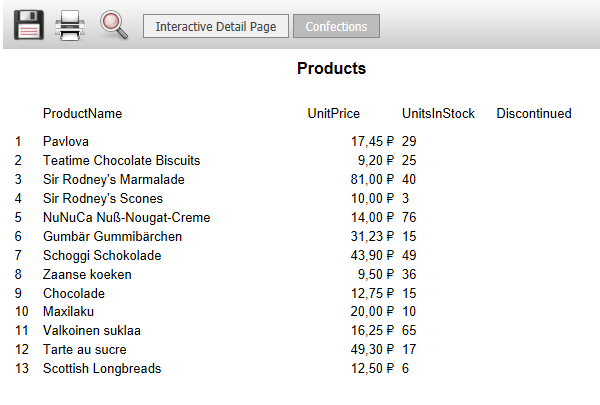
So we created an interactive report, without resorting to the creation of a separate file for detailed information.